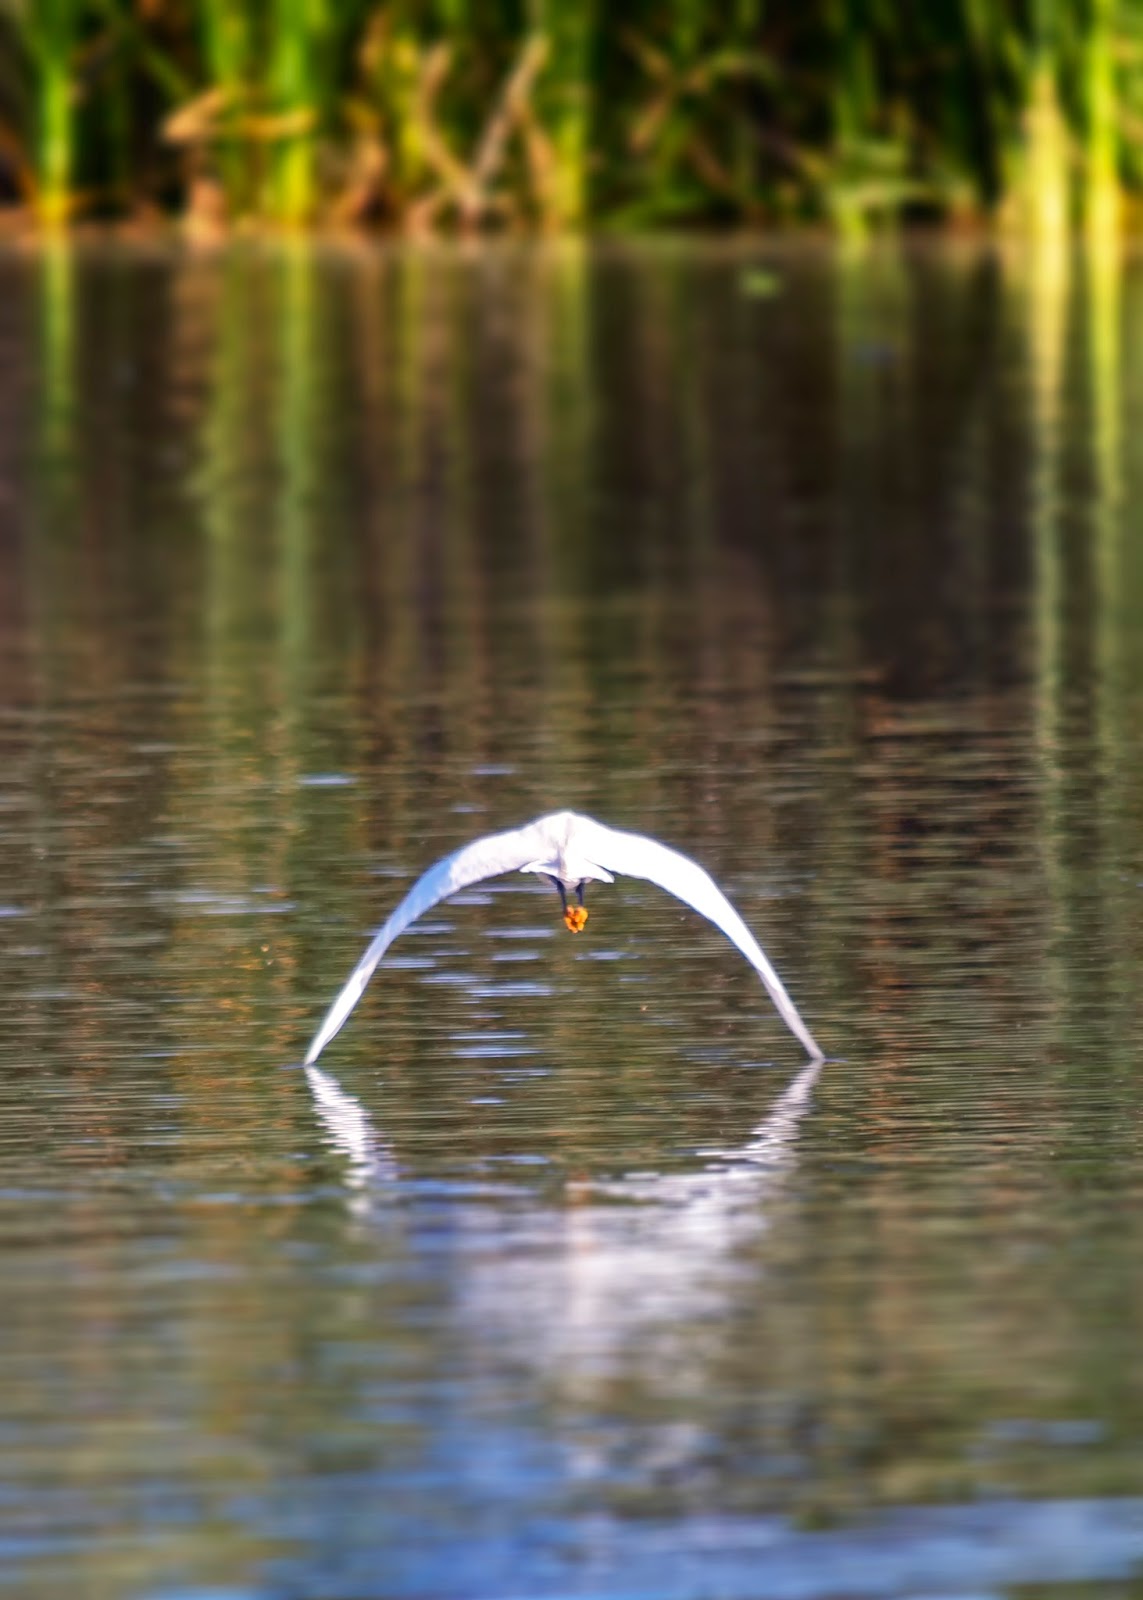
Saturday, December 31, 2016

Goodbye 2016!

Happy New Year!

Okay, it's still 2016 but only for a few more hours in Phoenix, Arizona, U.S.A.! This will be my last post of the year to my blog. I recently posted somewhat of a review of my photographic year and it'll have to do. Now it's time to pop the cork on some bubbly, watch the ball drop, and maybe, if I'm lucky, kiss the wife (probably mine!).

Updates to my Post Processing Online Book


I haven't been out photographing for a while, instead I've been working on a couple of eBooks about photography.

This picture says it all!
I've already made my "Randall Morter’s Awesome Photography Post-Processing Notes" eBook available, and you can get to it at any time using the link on the right hand side of this page.

I've been adding more content and I think it's starting to have some value. I've added some details about exposure along with a bit of a tutorial including some processing notes for one of my photographs of Panguitch, Utah. 

I'd really like to hear from you regarding whether you find it useful or not. Especially now that there are likely some people that got their first DSLR for Christmas a week ago! How exciting that must be!


Thank you!


Thanks to all of you who have read my blog this year. I hope you found it interesting or that it had some useful knowledge.

I hope you and your families have a wonderful new year visiting beautiful places that you've never seen before or never seen in the same way. And be sure to take lots of pictures!


Friday, December 23, 2016

Dealing with a Fear of Heights

Missing Out


Horseshoe Bend - sort of
I believe I've mentioned more than a few times that I've missed shots because I couldn't bring myself to get out to the edge of a drop off to take a photograph. Believe me, that is disappointing.

I was at Horseshoe Bend once for a really nice sunset but I could not go to the edge. I ended up with a couple of shots of more brave people at the edge and this shot that barely shows the slot where the Colorado River cuts through the sandstone on the Colorado Plateau.

More recently, when my wife and I visited the North Rim of the Grand Canyon National Park in October, 2016, I was unable to go out to various view points that I'd been out on the previous year. I was unable to go to Bright Angel Point using the path from the top of the rim (I'd tried and failed the year before, using the path from the viewpoints below the lodge).

Looking for Help


In November, 2016, when I went to visit Bryce Canyon National Park and got stuck in Utah for a week due to a blown transmission, I mulled over my fear of heights issue and the lost shots it costs me. It dawned on me that perhaps I could find help on remedying my issue on the internets. What a novel idea, eh?

View from my desk at my day job
Looking south down Central Avenue
I read quite a few different pages, blogs, etc. And found out that not all fears of heights are the same. In my case, I don't really have a fear of heights.

I work on the 23rd floor of my building in Phoenix. I have no problem going right up to the window and looking out. I did get out to one viewpoint at the North Rim that had good railings along the path (even though all I could do when there was hug the sign and then crawl back to the parking lot). I think I could easily do the Grand Canyon Skywalk.

I don't have a problem with the heights themselves. I have a problem trusting my balance and when the consequences of stumbling or falling are pretty significant, I apparently unconsciously try to keep myself from putting myself in situations that I may not survive. On the one hand I get disappointed that I can't go to the edge but on the other hand I'm amazed that I must have some built in guardian that is trying to keep me out of danger!

A lot of the information I found online regarding dealing with a fear of heights basically recommended that you address your fear by climbing on progressively higher platforms and getting comfortable with the height before moving to the next level. It makes sense to be afraid of heights to some extent because they can be dangerous however you can learn to live with the fear if you do it in baby steps.

Then I found a web page that I wish I'd bookmarked but can't find it to refer to it now. This source said it's not a good idea to blindly make people who claim to have a fear of heights try to overcome it by placing themselves in a precarious position. Because... Well, because sometimes the fear of heights is actually a fear of falling issue which can be based on physical conditions that mean that putting a person at the edge of Horseshoe Bend overlook could be putting them in peril.

That same page recommended that a person afflicted with a fear of heights should see a physician first in order to make sure there's no underlying physical problem. I'd like to thank whoever posted that sane information!

The Remedy (for me anyway)


Disclaimer: I'm not trying to provide any health guidance here so don't take what I say as applying to you or anyone else. My recommendation is to see a doctor.

I saw my primary care a few weeks ago. She did a very simple test - had me stand with my arms out and close my eyes. I was instantly wobbly (she was there to try to catch me). I think this might be a modified "Romberg" test. It was enough for her to clearly see that I have some issues with balance.

I was referred to physical therapy and had my first visit today. They found out a good number of problems (I couldn't easily walk heel to toe in a straight with my eyes closed while shaking my head around). I got a slew of exercises to do at home and will be having follow up visits.

This is somewhat of a relief. Now I know that I've got real, physical issues and that they can probably be resolved. I may get out to Bright Angel Point when the snow melts next year!

Friday, December 16, 2016

Reflections of 2016

Looking at 2016


I just received an award at my day job yesterday for being an employee for 15 years. It is near the end of the calendar year. Both of these events have caused me to reflect on this last year of 2016.

My DJI Phantom 3 Advanced
I spent a lot of time this past year dealing with health issues. Nothing too terrible, just sinus infections including Allergic Fungal Sinusitis, a nasty little collection of issues that resulted in a lot of down time and 3 surgeries.

At the beginning of the year I added a DJI Phantom 3 Advanced to my photography kit. I wanted to like it but ended up being very disappointed with the still image quality to the point that I am selling it. The video capabilities might be fun for some but I am not looking to do video. The still images are barely useful for posting on social media in my opinion.

I also don't like flying the thing. I got it after it went on sale at the beginning of the year for about $800 for the basic drone but it's still too much money for me to want to lose by running it in to something. It's just not for me.

Arizona's Raptor Experience 


Luna the barn owl
Arizona's Raptor Experience
I didn't really get out to shoot photography until May when I visited the Arizona's Raptor Experience in Chino Valley, Arizona, with a fellow shipmate from my last Navy ship, the USS Paul F. Foster DD-964 where we served together for such fun deployments as the first gulf war.

We spent a few hours shooting various raptors as the owners placed them on various features such as stumps which they had staged around their grounds. It was pretty amazing! I got a few shots that I liked, but the ones of the Harris Hawk in flight made me realize I don't have much practice or skill at capturing birds in flight!

Snowy Egret at Gilbert Riparian Preserve
Gilbert, Arizona
I did get this image of a snowy egret at the Gilbert Riparian Preserve in Gilbert, Arizona, which is my best shot of a bird in flight to date.

My birding experiences made me realize that I really wanted a longer lens. After reviewing the Sigma, Tamron, and Nikon lenses, I chose the AF-S NIKKOR 200-500mm f/5.6E ED VR. I didn't get out and try it much until later in the year...

In May I also dovetailed in a 1 night excursion  to the Chiricahua National Monument to shoot the Milky Way. I got a decent capture of it and enjoyed my overnight trip.

And, in May, I squeezed in a very short and unproductive visit to Saguaro National Park near Tucson, Arizona. Unfortunately I was only there during mid-day and did not even bother taking any photographs.

After my birding excursions I had a couple of surgeries and during the recovery (as well as a lot of the entire year) I spent my down time reading John Muir books which generated a great desire to visit Yosemite National Park. I put in a request for vacation for the first week of September, following the Labor Day weekend (a holiday for most people in the United States).

California Here I Come


I stayed in 3 California parks: Joshua Tree for one night, Yosemite for 3 nights, and Sequoia for 1 night. I got some shots that I like a bit but I know I could do better so I'm planning to head back sometime. I really want to get back to Yosemite in the early spring in order to try to get some photographs of snow on the ground. And, when I was there in early September, there was very little water in the falls. Yosemite falls was non-existent.


Moon over Joshua Tree National Park, California
Half Dome and El Capitan
Yosemite National Park, California
Sequoia at Sunrise
Sequoia National Park, California

More Parks for Me!


After I got home from my California parks, I was still feeling good (must have been the steroids I was on!) so I decided to take a day trip with my wife and our dogs up to Sunset Crater Volcano National Monument and Waputki National Monument, both near Flagstaff, Arizona. After she saw that, I talked her into spending a couple of nights at the North Rim of Grand Canyon National Park.

Sunset in Ruins
Waputki National Monument
Arizona

We went to the North Rim of the Grand Canyon for another 3-day holiday weekend for Columbus Day. I got a couple of shots of the canyon that I like but I also got some shots of wild bison that captured a wonderful experience of sitting on the ground  a few feet in front of wild and un-caged bison!


Sunrise at Walhalla Overlook
North Rim Grand Canyon National Park
Arizona

Wild Bison
North Rim Grand Canyon National Park
Arizona
And finally, not wanting to be done for the year, I decided to visit Utah's Bryce Canyon National Park over the Veteran's Day 3-day weekend in November. This trip ended up with the transmission on my Ford Explorer giving out so my visit at the actual park was cut short but I got a shot or two that I like. 

Sunset at Sunset Point
Bryce Canyon National Park
Utah

Six National Parks in 2016


The year's not quite over but I'm not sure if I'll get to any more National Parks before the end of the year. I've got half a notion to try to get to the Petrified Forest National Park but we'll see if I make it. Regardless, I visited 5 National Parks and 3 National Monuments this year that I had never been to before (I visited the North Rim of the Grand Canyon in 2015). 

In every park I got to see something that was new and amazing. There were always photography opportunities that challenged my artistic eye and photographic abilities. Some places actually took my breath away when dealing with the view or the heights or the bison.

Besides the bison, I got to see some other wonderful animals in their natural habitats which is much better than a zoo. I had some medical issues to contend with but it ended up making me appreciate the times that I got out even that much more and makes my photographs more personal as well since they captured what I was able to see and do in 2016. I hope your year was good for you too!

Tuesday, December 13, 2016

Tether Tools Case Air

A New Toy


Er, a new essential piece of photography equipment, that is. I posted a recent blog about not needing anything for my photography addiction, but I guess I was wrong. I was watching Scott Kelby's "The Grid" Holiday Gear Guide (Episode 260) (https://www.youtube.com/watch?v=Sh_39bWAack&t=198s, about 27:50) while having dinner and he mentioned 1 or 2 things I think I must have. So, I got one of them...

Tether Tools Case Air - What it Is


Tether Tools Case Air
The Tether Tools Case Air is a wireless tethering device that attaches to your camera via the USB connection (not the "accessory connection" that my GPS connects to) and can mount on the hot shoe or external flash mount, as shown in their advertising photograph at right. They also provide a lanyard that allows you to hang it from the camera strap connection.

The Case Air transmits and receives data via its own WiFi, connecting to your devices that you likely already own such as a smart phone or tablet or desktop computer. They have free software called "Case Remote" for both iOS and Android smart phones, as well as for PC and Apple computers.

Tethering allows you to use software on your device of choice to view the live view image that the camera sees, adjust many of the camera settings including and especially the aperture, shutter speed, and ISO, focus, and you can press the shutter release and the image is uploaded to your device! That is too cool! It does not provide control over zooming, panning or tilting.

I know there are other solutions out there, but this device is only $159.99. There is the CamFi for about $100 and the CamRanger for about $300 and I haven't used either one. Scott Kelby got me interested in this unit and when I found out they're here in Phoenix, that made up my mind to try their unit.

Why I had to have it


Tethering is a very nice thing to have in a studio for a few reasons. You can control your device while it's on a somewhat fixed tripod. Because of the file upload, you can rapidly show your client the images or you can quickly import them into Lightroom. With wireless tethering you avoid having cables on the floor to trip over or that may come loose from the camera or remote device.

I don't do studio shooting though, I do mainly outdoor shooting.

One of my problems is when I want to have the camera down low, perhaps only a few inches off of the ground. I often have a hard time laying down and looking through the view finder or even the live view monitor. Part of it is because of age and the shape I'm in but another part is because of the rocks and prickly things there are on the ground in the desert areas that I tend to shoot photographs.

I've seen other options, such as the Nikon DR-5 Screw-In Right Angle Viewfinder for $200, or external monitors. But for a lower price, the Case Air also allows me to adjust focus and take the picture remotely. I can't wait to get out and try it!

Purchasing My Unit


My Case Air Wireless after unpacking
I went to the Tether Tools company headquarters at 2202 E. McDowell Rd, Ste 5, Phoenix, AZ 85006 to shop for my copy. Josh brought one out that was hooked up and ready to go. Everyone there was very nice and helpful. This is not a paid ad for them, I just thought it was cool to meet their staff and get the unit from its birthplace.

When I got home, I first plugged the unit in to charge the battery, only to find out there was already sufficient charge to start using the device.

I plugged it in to my Nikon D610 and fired everything up per the instructions (I'd actually installed the software on my iPhone 5 the day before). When you start the system up it checks to see if a firmware update is required for the Case Air and it checks to see if an update is required for the remote device. In my case it let me know a firmware update was required so I installed it per the instructions.

Afterwards I needed to shut everything down and restart and then I was controlling my camera from my iPhone! Everything seems to work as advertised and I'm pretty happy so far. I'll wait until I get it out in the "wild" before saying much more about the performance.

It's nice to get a piece of gear that actually does what it advertises (most of my photo gear has been great that way). This actually surprised me a bit...

Surprise!


I had read a lot of the downloadable manual but had glossed over the details about the bracketing, HDR, and focus stacking shooting.

Case Remote Software
HDR Control Panel
from Tether Tools Manual
I don't get the difference between the bracketing and HDR modes, except that with the HDR mode it will cause your camera to shoot up to 9 images where it changes aperture, shutter speed, or ISO between exposures. You get to choose which exposure aspect you want to change and by how much. The bracketing mode is similar but with only 3 shots. It seems redundant to me - I think the HDR feature should be called bracketing and the existing bracketing function is unnecessary.

But, my Nikon D610 only offers 3 shots and I've often wished I had more shots like the 5 on the D810. Now, with my Case Air, I've got up to 9! And, since I can control it remotely, I don't have to touch the camera in order to change things, for example if I wanted to shoot a burst of "HDR" shots by changing the shutter speed and then wanted to try another burst where the ISO changes. Surprise!

I don't have any functionality built in to my D610 to do focus stacking and I'm not aware of any camera that does. This is really cool and is another surprise! Again, you can select to shoot up to 9 images where the Case Remote software changes the focus between each shot. I've recently been discussing focus stacking with a fellow photographer (actually he's mainly a videographer) and this just seems really amazing.

Additional Notes


Another couple of things I noticed about the system are:

  1. The software doesn't work well when the D610 is in a "user" mode (U1 or U2). I couldn't control the camera until I switched to the "manual" mode (M), which is basically the same as a user mode.
  2. That's okay because you can store a lot of camera settings in the Case Remote software including auto focus settings, and you can name and load settings in Case Remote. That means you could save some settings for wildlife vs. landscape.
  3. The software does not upload RAW files to iOS devices (Josh informed me of that). That means you can't zoom in on an actual image UNLESS you shoot it as JPEG (or in my case RAW + JPEG at a minimum). That sounded like a drawback until I noticed you can flip between shooting RAW and JPEG format quickly on the Case Remote software - you can change to JPEG, shoot an image, upload and inspect, adjust and repeat as necessary, then switch to RAW to take your "real" file. And, if desired, you can delete all of those JPEG files from the Case Remote software! That is convenient!
One final note - I also installed the Android software on my Samsung Galaxy Tab 4 tablet that I use with my DJI Phantom 3 Advanced. The software installed and worked fine on it too but there are differences. The iOS version has more controls available and the layout is a bit different. However, the Tab 4 has a much bigger screen than the iPhone 5 and it allows you to upload RAW files (not that you can do anything with them once they're on the Tab 4). I just wanted to mention that the software works well on those 2 devices. I haven't tried it on my PC yet.


Thursday, December 8, 2016

Photoshop CC 2017 Update

The New Phone Book is Here!

Regarding the new Photoshop version, I'd like to be as excited as Steve Martin was about seeing his name in a phone book. I keep hoping! But this version seems to only have some minor updates or enhancements, at least for photography users.

I don't use Photoshop that much to begin with, and I keep hoping I'll see more reason to use it. I primarily use Lightroom. I find it quicker and less fiddly than Photoshop. There are times, however, especially for healing or cloning items that you don't want, where Photoshop provides the control that you just don't get in Lightroom.

As for my wishlist, I wish that they'd re-organize their user interface. Maybe it's just me but I don't see the distinction between filters and tools, or why there are links for some types of layers (Brightness and Contrast) above the list of layers. I don't understand why things are scattered all around the display without much apparent reason or order. But I am probably too old school and too little millennial to enjoy having to search for things in a cluttered and nonsensical user interface. I'm also one of those people that hate the Microsoft "ribbon" garbage.

I recently had occasion to look at a book I likely hadn't opened once in the last 35 years, "Standard Mathematical Tables", 27th Edition, by William H. Beyer. I no longer remember how to use many of the various equations, but it was a pleasure seeing how well organized complex information can be.

I remember a software program I wrote in the mid or early 1980's that provided parts breakdowns for recreational vehicle equipment and how well it was organized, allowing you to drill down to find an individual part for a specific automotive refrigerator manufacturers model for example.

I think there is often a disconnect in software user interfaces because software developers create something such as an enhancement to Photoshop and stick a link to it in the menu that they were working in when they came up with the idea rather than considering where it might be better placed with regard to work flow. I've done it and seen it. Rogue software developers end up adding functionality to a user interface instead of leaving that to (in this case) a photographer (or other end user type) that actually uses the software.

Granted, Photoshop has a lot of functionality in it that I don't even use, such as creating 3-D objects. They've somewhat addressed the issue by offering different user type layouts. I just wish they were more flexible or that the functionality wasn't laid out so confusing in the first place. I'll end my rant here.

Saturday, December 3, 2016

FREE: Randall Morter’s Awesome Photography Post-Processing Notes

A Free Post-processing tip sheet!


Cover of a valuable literary achievement
I've made my post-processing tips document available to anyone who is interested (and I'm sure just about every photographer will be). Actually, I don't have a ton of content in it yet but since I keep having to look up how to do things that I've done in the past, such as how to process a milky way shot, I thought I'd at least start a document that either has the instructions in it or links to the sites I find helpful.


You can get to this valuable information from this link:

https://docs.google.com/document/d/1nBKCPCy3-NbRe8xXzr5uh2SRgJGMXvpjfZMSXrfMIYI/edit?usp=sharing

There's a link to the document on the right hand side of this blog page (on the desktop version anyway) called "Randall Morter’s Awesome Photography Post-Processing Notes".


Wednesday, November 30, 2016

I Got Everything

I recently got the new B & H catalog. I recently perused through the YouTube suggestions (based on my viewing history). I recently cleaned all of my gear before going to Bryce Canyon National Park. In all cases it made me think about my gear, and even more importantly, that there's nothing I can think of that I need to add! That must mean that I've arrived!

I wrote and recorded a song 5 years ago called "I Got Everything" that comes to mind although that song is more depressing than this issue about photography gear (if you go to the page, http://www.poppavein.com/RRhythmia.aspx#IGotEverything, you can  click on the ">" image left of the song title to stream the song.

My D610 with an old Nikkor 70-210mm F4-5.6D
and my Opteka GPS unit
I can look through the B & H catalog with only mild interest because there's just nothing that I want to get. Oh, if funds were unlimited I might buy a big format printer, perhaps a Nikon D5, or even some faster Nikon lenses. But frankly, at my age of a certain age (or at least approaching a certain age), I am trying to get rid of possessions (such as my music gear!).

This last summer I toyed with the idea of getting a Nikon D810 when I found them online (at B & H or Adorama or somewhere) for about $2,000. I believe they were re-furbished but I'm okay with that - my Nikon D610 is refurbished. I've had it for 2-1/2 years and the only problem I've had with it is due to letting a co-worker handle it and he twisted the mode switch without pushing in the lock and wore it down.

Nikkor 20mm f/1.8G ED Lens
After thinking about it and reading more reviews, the D610 is considered to have better low-light image quality and since I prefer shooting low light images over other images, it just didn't make sense to pick it up. Instead I added the Nikkor 20mm f/1.8G ED lens. That saved me about $1,200 and gave me a wide angle f/1.8 lens!

On the one hand, my lack of desire for additional gear means I don't have to spend money. On the other hand, I kind of miss the excitement I had when I first started this hobby - finding new pieces of equipment I thought I had to have, researching which equipment to buy, ordering it, unpacking it, and finally, using it!

If you're just starting to get involved in photography, I'm jealous! Enjoy and savor your adventure.

Tuesday, November 29, 2016

Quick Tip about Camping with a Cooler - Updated

Tip of the Day - Staying Cool


I wanted to pass on a tip I have about using a cooler when you're camping or for any other reason...

When I stayed at the Mono Lake Overlook in September with a fellow boondocker, Gene, he told me that he makes his own ice for his cooler. That didn't seem that novel but at the same time, I hadn't thought of doing it and I use a cooler quite often. I've always bought blocks of ice from the gas station as I prepare to head out.

Another thing I hadn't realized, and can only take Gene's word for it, is that the water that is often used to make the blocks of ice that you buy commercially is aerated which in turn means that it doesn't last as long. Gene said his blocks will often last as long as his weekend camping trips.

I can confirm a couple of things:

  • Blocks of ice last longer and work better in a cooler than ice cubes
  • Blocks of ice rarely last more than a couple of days in Arizona

Walgreen's Nice! Distilled Water
It wasn't until after my wife and I visited the North Rim of the Grand Canyon in October that I remembered Gene's tip and decided to freeze some ice of my own. Gene said he had purchased some Tupperware type containers to freeze his ice in that had a nice taper which allowed him to slip them out of the container before using them.

I didn't have any similar containers laying around the house but I did have a number of empty 1-gallon water jugs that I'd purchased distilled water in. I filled a few of them up and stuck them in the freezer - without replacing the lid (not that it probably matters).

When I went to visit Bryce Canyon National Park I grabbed one and stuck it in my cooler. What I found out was that this worked out great.

First, as the ice melts it stays in the container. This means that it doesn't get the rest of the contents of the cooler wet. I put a lot of the things in my cooler inside a water-tight container so that they don't get wet from the melting ice. That wasn't a factor due to having the melting ice trapped inside the water jug.

Second, as I ended up being delayed in Utah due to a transmission problem, I moved my cooler contents including the water jug into the room refrigerator. I wasn't expecting it, but the refrigerator must have been cold because the water inside the jug froze again. The second benefit of using this type of container for ice is that it is possible to recycle the water multiple times unlike the purchased ice which melts and then typically gets emptied out on the ground (I usually dump it on my flower beds when I return home).

I'm sold on this! I keep 2 or 3 of these in my freezer. They're easy to grab because of the handle. The melting water doesn't get all over the cooler contents. I can recycle the water instead of wasting it. I hope you find this useful too!

Update, 12/8/2016


Arrowhead Distilled Water Bottle
I use a lot of distilled water for personal issues. I recently picked up a gallon of Arrowhead distilled water. I like their bottle better than the type pictured above - the picture at right probably doesn't show it, but it's got a smaller horizontal size and is a bit taller than the bottle above.

That means this bottle will take up less room in a cooler, allowing me to pack in more jerky and fruit!

And the plastic in the Arrowhead bottle is thicker which means it should last longer, not dent, etc. I think I'll get a few of these and keep them!

Monday, November 28, 2016

Trying to stay motivated

Stagnation


Since my problematic trip to Bryce Canyon National Park (see my November 21, 2016 blog) I haven't been motivated to get out and shoot anything. I'm in a photographic doldrum.

I've been searching and reading on other sites for cures to this malaise regarding getting outside with my camera, and some of the tips have been okay. They just haven't been enough to push me back over the edge into getting out there.

Attempts at Overcoming


Photoshopped image of my dog Elmer
Wilcox Playa, Arizona
I have tried watching videos of photographing or hiking areas on YouTube or other services with the hope that they would spur me to visit the places or somewhere similar. One video was shot partially in the Utah salt flats and gave me a mild yearning to get back down to the Wilcox Playa in Arizona (near, surprisingly, Wilcox, Arizona).

I still think that area has some photos to offer if I was just a bit more creative. I saw a similar shot taken in a location like that with a sweating bottle of water or something as a foreground object with the expanse of the playa in the background. Plus, I like that area for some reason. It's the gateway to the Chiricahua National Monument which may be the attraction for me.

Last Friday, the day after Thanksgiving 2016, I worked. I woke up early, grabbed my camera and tripod, and got in to the high-rise that I work in on Central Avenue in Phoenix, Arizona. Since moving there this last summer I've been wanting to see if there were any photographic opportunities possible by shooting out of the windows. I work on the 23rd floor and also have access to the 16th and 19th floors.

Unfortunately there were not any good shots of the downtown high-rise buildings and the other buildings around mine didn't have many lights on. There just wasn't a shot that inspired me to even get my camera out of the bag. I even went down to the street to see if it would yield anything but I didn't like any shots there either. The only shot I envisioned at all was a long exposure with car tail lights but because it was a holiday day there wasn't much traffic. I gave up there too.

I've even tried flushing my mind. I've had dry spells before when I was writing and recording music and often the thing that got me rejuvenated was completely forgetting about music for a while. The time length varied, too. I'm trying to do that still with the photography but it's hard to forget about it.

Remedy?


Superstition Mountains
If nothing else inspires me before this next weekend, I'll at least try going out to the Superstition Mountains. Perhaps I'll even try staying in the Lost Dutchman State Park overnight.

That place usually offers some sort of photographic opportunities. And I still don't have any golden hour shots from Tortilla Flats which I think could offer something. Perhaps even Roosevelt Dam,

It's not that there aren't some photogenic locations pretty close to Phoenix, heck, I wouldn't even mind the drive back to Joshua Tree National Park.

I can't blame the scenery - I just need to get back out to it!

Friday, November 25, 2016

My Stay at Panguitch, UT

Why Panguitch?


My Explorer at the Bryce Canyon Pines Chevron
This post is more of an automotive issue blog than photography but it happened while traveling to take some photographs so I thought I’d share. I drive to my photography destinations from my home in Phoenix and I guess it was inevitable that I’d have car troubles at some point.

I mentioned in my earlier blog on November 21, 2016, that I headed to Bryce Canyon National Park for the 2016 Veteran’s Day Holiday Weekend but before I got there the transmission went out on my Ford Explorer. I had made it to the Bryce Canyon Pines Store & Campground Chevron gas station. I tried turning around there to head back to Kanab, Utah, but the Explorer just didn’t want to make it up the hill heading west from the Chevron. It was slipping out of gear.

The couple running the store and gas station was very helpful with getting me in contact with repair shops and towing companies. I wasn’t completely sure what the issue was, and initially I thought (and hoped) that the transmission was low on fluid. There are some services at Ruby’s Inn Car Care Center located just outside of the Bryce Canyon National Park gate. I talked to someone from that shop but I didn’t get the impression that they could do a transmission repair.

He seemed like he was a young service station attendant and just didn’t instill a desire for me to use their services. Plus I thought that if there was something more serious with the transmission that I’d end up having to tow the Explorer somewhere else anyway. Looking at their website now, however, it looks like they may have been able to handle it.

The couple at the Bryce Canyon Pines Chevron also gave me a telephone number for 
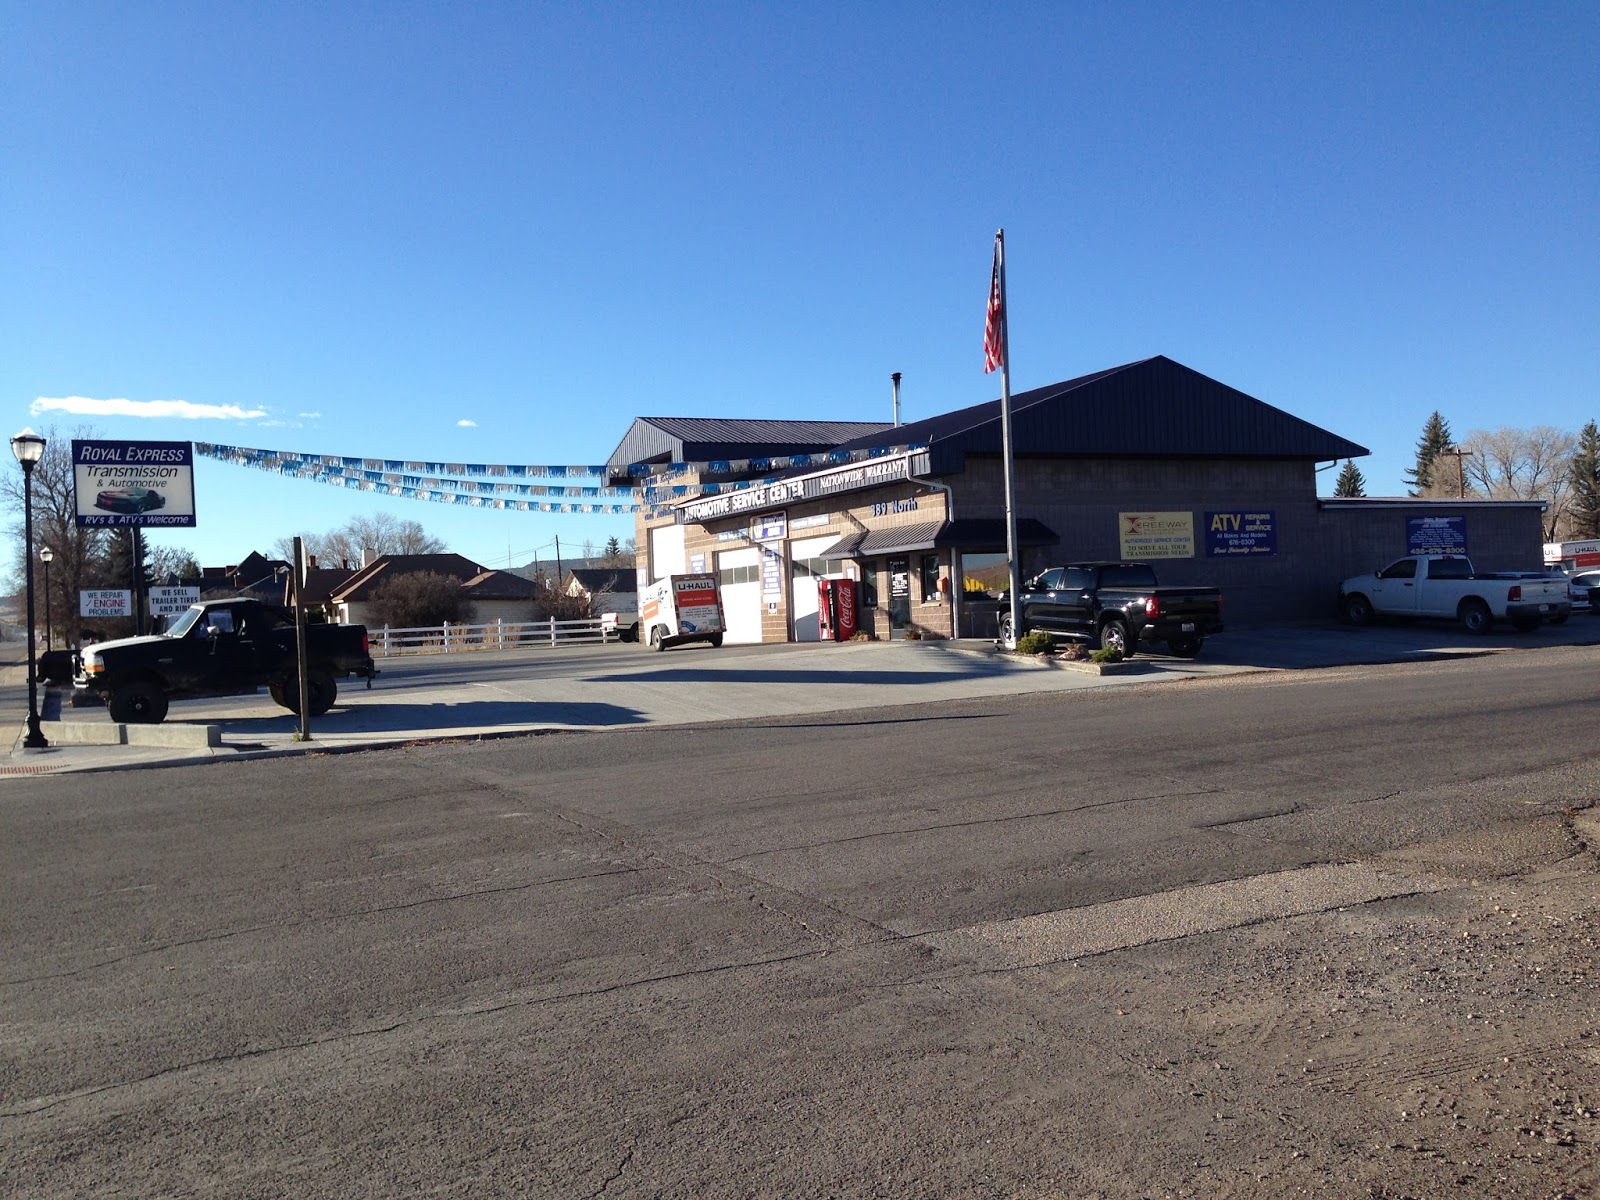
Royal Express Transmission and Automotive in Panguitch, Utah, about 23 miles from Bryce Canyon National Park. I called the owner, Stewart Ivie, and he was confident he could diagnose and handle any services or repairs. He just gave me a warm fuzzy that I didn’t get from the Ruby’s shop representative.

Arriving in Panguitch


I arranged for a tow through State Farm Insurance (I have that rider on my policy). They contract with American Towing Service out of Circleville, Utah, which is another 27 miles north of Panguitch. I talked with the tow company owner Craig Sudweeks a bit to get his opinion of where to have the service performed and he felt that the Royal Express shop in Panguitch would be a good option so between my impression of Stew and this vote of confidence from Craig, I followed his advice and decided to have the Explorer serviced in Panguitch.

Royal Express Transmission and Automotive
It took about an hour for the tow truck to arrive from Circleville, which is when I met Craig. It’s probably due to my age but I’m glad when I have to deal with people more my own age. I won’t guess how old Craig is but I will say that I don’t think he’s less than 40. It took about 45 minutes for him to load my Explorer and take me to Panguitch. I really enjoyed the drive and the talk we had. He’s quite an interesting guy, having done ranching, farming, long haul truck driving, and having his own auto shop.

I met Juarez at the Royal Express shop. He was able to get my Explorer up on a jack immediately and we looked at the undercarriage. The transmission on the Explorer is basically not serviceable by the owner. There is no fluid dip stick or fill spout in the engine compartment. Once the transmission is filled it shouldn’t need service often. If it’s not leaking you shouldn’t have problems.

My transmission wasn’t leaking. It was nice and clean – like a lot of Arizona automobiles and unlike any of the cars I’d had in Oregon and Washington! But, as Juarez pointed out, that meant there was likely a more severe issue. He pulled the plug and black crud poured out. Juarez had me smell it and it smelled burned. This, coupled with the inability of the transmission to stay in gear, indicated a replacement was needed. Nothing is built to be repaired any longer, I guess.

Should I Stay or Should I Go?


I called my wife, who in turn called our Rodeo Ford dealership in Avondale that we’ve used for years. Our mechanic there said the diagnosis seemed plausible and the $3,300 estimate from Royal Express was in line with their cost, so I gave Juarez the go-ahead on replacing the transmission.
I also considered towing the vehicle back to Phoenix and asked Craig about it. He said it’d be $1,500 for that tow! If we did that we’d also have the replacement cost on top of it.

The Marianna Inn, Panguitch, UT
Juarez thought they’d be able to have it done by Monday so I was not too upset with the issue. I'd end up missing one or two days of work. On top of it he gave me a loaner van to use. I guess I needed to get settled in for a few days.

I asked Craig about motels in town and he said they're all pretty much one as good as the other. I loaded my camera gear and some of my other gear in the van and headed out. The first motel I pulled in to was the Marianna Inn and when I asked about rates the owner gave me $5 off for the night so I decided to just stay there for the weekend. I got a room for $45 per night plus taxes and paid for 3 nights. I settled in to my new accommodations, filling it with my camera and camping gear.

Monday, Monday


I spent the weekend mainly watching TV, watching my Kindle, and writing in my journal. On Monday morning I called Royal Express about 9:00 AM and got my first bad news. Stewart said the transmission wouldn't be in until Wednesday at the earliest.

I paid for another couple of nights at the motel and waited the time out. On Wednesday I got my second dose of bad news. The transmission had been built out but it had the wrong type of linkage to the drive shaft and had to be re-built. They now expected that it would be in by Thursday morning and that they should have it ready by 11:00 AM. I paid for another night at the motel.

The weather report for Wednesday night and in to Thursday called for 1 to 4 inches of snow. I became worried about the delivery of the transmission - it was coming from Salt Lake City which is about 4 hours north of Panguitch and there were some hills along the route. Not that we were that low in elevation at Panguitch anyway; it is at about 6,600 feet.

Getting In Gear


Snow on US 89 in Panguitch, UT
On Thursday morning I woke up about 5:00 AM. I'd woken up a number of times during the night and had got up to look to see if there was any snow. I probably last looked at about 2:00 AM and there wasn't any snow. At 5:000 AM, however, there was a blanket of snow and it was still lightly coming down.

I was crossing my fingers that the amount of snow would be trivial to Utah residents. At 6:00 AM I walked to the Silver Eagle gas station near the motel to get a cup of coffee and a muffin. I asked the attendant if she thought this was snow and she said no, it was nothing. I still had hope that my transmission would have made it through.

I called the shop around 10:00 AM to inquire about the progress and was told they should have it ready soon. I waited until a little before 11:00 AM to check out of the motel and then drove to the shop. I was told it should be finished after lunch and Stew suggested that I go get some lunch myself.

Kate Lublin Alexander Cabin
I wasn't hungry - I only wanted to get home - so I decided to go wait at the rest stop north of town. I walked around the park area, read some pamphlets and other material I had, took some iPhone pics, and enjoyed the cool temperatures.

The sign for the Triple C Arena was flashing between 27 and 31 degrees Fahrenheit. It was also pretty windy, so I'm sure the wind chill made it feel even colder. But we don't get cold often in Phoenix so I kind of enjoy it for a little bit.

Finally, at about 1:30 PM, I drove back to Royal Express. It was finished but didn't feel right during the test drive so they were looking at it some more. Dang!

At about 3:00 PM they had figured out the issue (a linkage was misaligned) and corrected it. I paid my tab and was finally on my way south!

Impressions


No, I'm not going to do any impressions. But I was impressed with how nice everyone was in Panguitch, or even Utah in general. Granted, in my conversations with everyone I encountered I was a customer, but the politeness I heard between others as well as myself and the enjoyable driving habits was very refreshing when compared to Phoenix. The morning news (which was actually out of Salt Lake City) did not have multiple shootings or murders to report every day. I don't think I'd mind living in Utah at all.


Tuesday, November 22, 2016

Photographing Bryce Canyon National Park

First Visit


Sunset Point Detail
As I indicated in my previous post, my first trip to Bryce Canyon National Park in November, 2016, did not go quite as planned due to my Ford Explorer transmission failing. As a result, even though I spent almost a week in the area (at Panguitch, Utah) I ended up only spending about 2 and a half hours at Bryce Canyon National Park.

I did not visit all of the view points. I did not even drive to the end of UT 63, the road through the park. I visited the visitors center, the Sunset, Bryce, and Inspiration view points, and North Campground. My sample of the park is limited.

Photographing at Sunset


As I discovered while researching the park before my visit, Bryce Canyon mainly runs north and south. The park is located on the west rim of the canyon. This means that, from the view points, sunrise is probably the better time to take photographs. My short visit was at sunset.

Sun Setting at Sunset Point
At sunset time there can be a lot of shaded area and because the cool hoodoos are mainly close to the west rim, they can be in shadow when the eastern part of the canyon is still lit. You can see this in the photograph at right.

This  makes the photographs hard to post process and basically not terribly attractive. The red of the hoodoos just isn't as spectacular as when they're lit directly. And, as in the picture at right, the near hoodoos are more striking than the distant landscape and should be the focus of the image however, due to them being in shadow, they really don't command the attention in the photograph.

One solution is to crop out the lit areas or to not include them in the crop at exposure time. Another reason to use a longer lens for landscape photography. The crop of the photograph at the top of the page is somewhat different - I was able to get the interesting formations while they were still lit by the sun and to include the "bank" behind them which was in shadow. I'm happier with that composition.

My Favorite View Point

Again, my time at Bryce was limited. But out of the 3 viewpoints I stopped at around sunset, Inspiration Point was my favorite. I felt it provided a nice place to fill the image with hoodoos.

Shot from Inspiration Point

This shot might actually be better in mid-day light. This shot is basically looking north from the view point, perhaps 5 or 10 degrees east of north. I didn't see it at sunrise so I can't say for sure how it would look, but the sun would be hitting the right side of the hoodoos. Perhaps during the winter months the sun rises far enough to the south that it might get more direct sun as it rises.

What's Next?


I definitely want to go back when I am not focusing on my automobile issues. I want to see all of the viewpoints, including the Natural Bridge. From the rim, all photographs have a perspective of looking down at the hoodoos. All of the shots I took are very similar, at least from that perspective. I think you need to hike down into the canyon a bit to get different perspectives.

I think there are probably a lot of good photography opportunities there, and I know it is a destination for a lot of photographers. Personally I didn't find much diversity. Yes, it's different than a lot of other areas but it just struck me that there is really only one subject - the red hoodoos.

Frankly, I think I got spoiled by Yosemite and Sequoia / King's Canyon National Parks. I really like the diversity of subjects at Yosemite - the granite, the valleys, and the rivers and water falls. I had the same lack of enthusiasm at the North Rim of the Grand Canyon in October, although I did get to shoot some bison photographs there. I'm trying to keep my enthusiasm up for non-Yosemite landscapes!


Monday, November 21, 2016

Bryce Canyon National Park - Postmortem

I'm Back - Finally!


A selfie at Bryce Canyon National Park
I made it to Bryce Canyon National Park and back but not without some issues...

Per my plan, I headed up to Utah on Friday, November 11, 2016. I expected to just be gone over the 3 day weekend, returning home on Sunday, November 13, 2016. I left Phoenix at about 2:30 AM after filling up with fuel and coffee, expecting to arrive 7 to 8 hours later at Bryce Canyon National Park. I half planned to try to get some sunrise shots along the way if I was somewhere that I thought might be interesting.

I use about a half a tank of fuel in my Explorer to get to Flagstaff so stopped there about 2 hours later to top off the tank and grab another coffee. It was about 25 degrees Fahrenheit when I got out of the Explorer in Flagstaff - that helped wake me up!

Lake Powell Wahweap Overlook


Wahweap Overlook at sunrise
As I headed on up the road it was looking like I'd hit Page and Lake Powell about sunrise. I pulled off the highway to visit the Lake Powell - Wahweap Overlook. I'd tried to go up there a year ago but as I turned on to the road on that visit, my cooler tipped over in the back of my Explorer. Fortunately my sleeping bag was laid out so it soaked up all of the melted ice water! Anyway, I ended up taking care of that mess and never did get up to the overlook.

This time I did go up there, hitting it before the sun broke over the horizon.

I was disappointed in the location. The view of the lake isn't great from there. The main body of water has the Wahweap Marina in it and it just wasn't that pretty to me. At this time of year (November), the sun is rising in the south-east which means you're shooting towards the Salt River Project-Navajo Generating Station and it's tall stacks. Another feature I don't care to take photographs of.

But, I did get a sunrise shot using my 70-200mm lens so that I could narrow my field of view. However, I really wanted a sunburst but forgot to close down the aperture to f/22. So, here's what I got:

Sunrise over Lake Powell

On to Bryce Canyon National Park?

I headed on up the road, passing in to Utah along U.S. 89. I drove through to Kanab, UT where I again filled up the fuel tank and grabbed another coffee and some Pop Tarts. The next stop I planned on was at Bryce Canyon National Park, about an hour and a half from Kanab.

From U.S. 89 you need to turn east on UT 12, which leads to UT 63, the main road through the park. Before I got to the UT 12 turnoff my Explorer started running rough. I turned on to UT 12 and drove through the Red Canyon and made it to the Chevron / Bryce Canyon Pines General Store at mile marker 10, where I pulled in.

Royal Express Automotive
I decided I better head back to Kanab but when I tried to leave the Chevron I couldn't make it up the very slight incline. I had to do a 3 or 4 point turn on UT 12 because there is not much of a shoulder along the road there, and then made it back to the Chevron parking lot.

After some time, and with my wife working on things from Phoenix, we arranged for a tow (through our auto insurance, State Farm), to Panguitch, UT where there is a transmission shop. Eventually, after a couple of hours, I arrived at Royal Express Automotive.

It turned out my transmission was shot. I ended up staying in Panguitch until the following Thursday before it was replaced. I got my Explorer back at about 3:00 PM on Thursday, November 17, 2016. 

Off to Bryce Canyon National Park - for reals


I had hoped to get the Explorer back by 11:00 AM or so, and then to at least do a drive by on my way back to Phoenix. While I was waiting at the auto shop, I struck up a conversation with a woman who turned out to be the wife of a ranger at Bryce Canyon National Park. She convinced me that I should visit it as long as I was this close. So, after getting the Explorer and its new transmission, I headed there.

It was very cold - my Explorer said 21 degrees Fahrenheit - and pretty windy. Everyone was bundled up. I first went in to the Visitor Center to get my National Park Passport cancellation stamp and picked up a couple of souvenirs.

Then I visited Sunset Point, Bryce Point, and Inspiration Point. The sun was pretty low in the sky and the shots weren't that exciting. The scenery was nice but it was so cold that it was miserable to be out on the viewpoints to take it in. I tried, and I took a few shots, but damn it was cold!

I toyed with staying overnight but I thought I'd seen a weather prediction of temperatures getting to about 6 or 7 degrees Fahrenheit and I just couldn't bring myself to going through that after the week I'd spent already. So I settled for a few shots with the intent on visiting again, hopefully when it is a bit warmer!

Sunset Point Detail


Thursday, November 10, 2016

Free Photography Location Notes Form

Photography Notes Form


Photography Notes Word Document
As a follow up to my last post about preparing for a visit to Bryce Canyon National Park, I (finally) took the time to create a Word document that I can fill out with notes about my destination. I've been wishing I had something like this for a while and I'm going to see if I like this form.

If you're interested, you can download my document (http://www.PoppaVein.com/files/PhotoLocationNotes.docx) to see if it's anything you can use. It's written with Microsoft Word 2013.

You can download the word document, save it to your computer, and fill it in when researching a photography destination. You can enter as much or as little detail as necessary. I wish I'd had something like this prepared when I went to Yosemite National Park for the first time. There are a lot of places to see and having some notes about where to go would have made things easier.

Bryce Canyon National Park Notes


I've filled one out to use at Bryce Canyon National Park, including some notes from the site I mentioned in a previous post from Bret Edge : PHOTOGRAPHER’S GUIDE TO BRYCE CANYON NATIONAL PARK.

If you're interested, you can see what I've filled in by downloading it (http://www.poppavein.com/files/PhotoLocationNotes-Bryce.docx).


Tuesday, November 8, 2016

Preparing for Bryce Canyon National Park

Heading Somewhere New


I've never been to Bryce Canyon National Park but I'm planning to go over the Veteran's Day weekend. It's not too far from my home in Phoenix, Arizona; according to Google it's about a 7 hour drive. That drive is the route through Page, Arizona.

I don't know if I've mentioned it here before, but I drive about everywhere. I haven't flown for probably 10 years and if I can avoid it, I hope to never fly again. I probably only have a normal amount of fear of flying but I have a huge distaste for the hassle of airports and I like driving and having my vehicle with me. That does mean, however, that visiting the east coast of the U.S. takes more time and effort.

Here are some or most or all of the steps I'm going through to prepare to visit somewhere new...


My 3 Point Pre-Visit Checklist


  1. Choose a destination
    1. Determine the time available and therefore the maximum distance
    2. Look on the map for new destinations
    3. Look at pictures taken at new destinations
    4. Choose the new destination
  2. Determine lodging and dining locations
    1. Is free camping available?
      1. If not, is paid camping available?
        1. If not, where are the cheap motels?
    2. Where are the cheap eateries like McDonald's?
      1. Are there stores available for sandwich makings?
  3. Compile a list of photography targets
    1. Research any online guides to the destination
    2. Do a more thorough review of any online photographs
    3. Look at the Photographer's Ephemeris to note sunrise and sunset times and sun locations and moon information with respect to one or more photography targets
    4. Create and print a list of photography targets with notes

Gear Checklist


Since I normally take just about everything I own, which is easy when driving my vehicle, the only real checklist items here are:

RAVPower USB / WiFi Hub
  1. Cleaning
    1. Clean camera sensors 
      1. Built in cleaning plus the "Rocket"
      2. Once per year have the sensor professionally cleaned
    2. Clean lenses
      1. Normally dusting and "Rocket" are all that is required
  2. Charge all batteries
    1. Cameras
    2. Kindle
    3. USB / WiFi Hub
    4. Small recharger

Personal Items


I also need to pack clothes, a toothbrush, and perhaps some deodorant. You never know when those things might come in handy! I actually keep my travel bag mostly packed with my travel clothes so I don't have to do a lot in this area.

If I'm taking my dog Elmer I throw in his blanket, bed, sweater, and dog food.

My notes about Bryce Canyon National Park


When looking for a destination I settled on Zion and / or Bryce Canyon National Park. Zion seemed potentially more interesting, or at least more diverse. However, until after the Veteran's Day weekend, you have to use their shuttle to get around inside the main valley. I didn't like that for 2 reasons: 1) I'd have to carry gear that I thought I'd use while leaving the rest unattended in my vehicle; 2) it automatically excluded the option of taking my dog Elmer. I chose to go to Bryce Canyon.

I'll only have 1 full day at Bryce Canyon, but since I'm still not physically fit enough to do much hiking, that should be fine. I should be able to get 2 sunsets and 2 sunrise opportunities. There are free camping sites such as U.S. Forest Service "Red Canyon" (although it's closed this time of year) or FR088. I intend to leave on Thursday to get a head start, and to camp for free near Sunset Crater NP close to Flagstaff, such as near the park entrance.

I found a few websites that are helpful when it comes to photographing Bryce Canyon National Park including this one from Bret Edge Photography.

I'm looking forward to visiting this new (to me) park and hopefully getting some great shots!