Saturday, November 23, 2024

Nikon D850 + Nikkor 200-500mm f/5.6E ED AF-S VR + AF-S Teleconverter TC-14E III

Trying to get back in the saddle

I recently retired from my day job and am trying to get back into photography. I haven't tried taking a photo where I knew what I was doing since January 2017 at the Saguaro National Park in Tucson. That's some hiatus!

I've only got about 1,000 images on my Nikon D850, mostly just snaps I took around the house trying to keep from totally feeling like I wasted my money on the D850.

I also wonder if anyone pays attention to blogs any longer but I'm going to post here anyway.

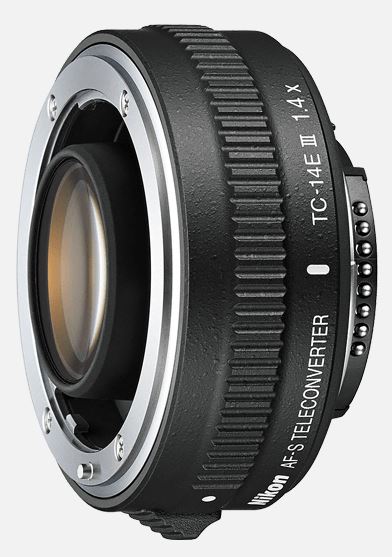
Nikon AF-S Teleconverter TC-14E III


This week I added an AF-S Teleconverter TC-14E III to my kit.

Some of the "practice" photographs I've taken have been at a nearby wetlands, Tres Rios Wetlands. I decided to try adding some more reach to my AF-S NIKKOR 200-500mm f/5.6E ED VR lens. This converts that lens to a 280-700mm lens. I've read that it can soften the image quality but I wanted to try it for myself.

It was also required a bit of investigating to determine if the teleconverter was compatible with the 200-500 lens. One Nikon page said to check the instruction file that comes with the lens. You can go to Nikon's web site to download the file. Unfortunately, the 200-500 lens is NOT listed as being compatible. However, I found one more Nikon web page on which Nikon implied it was, and I saw other photographers were using the combination so I took the plunge.

The Results

Here's one of the images I captured. There was no processing or cropping on the image in Light Room Classic other than exporting to a smaller size JPEG.

ISO 64, 700mm, f/8.0, 1/640s

Here's the list of issues I had capturing the image.

  • I think the image is soft. I don't know if it's the teleconverter or my focus skills. I don't trust my focusing much. I was trying to use AF-C shooting mode with D9 AF area. The egret was mostly standing still but turning its head. The head is soft. I can't tell from the water if I the camera was focusing in front of the head but it looks like it may have been. Probably due to my inability to get the center focus point right on the eye.
  • I have developed shaky hands so I took this on a tripod. But, I was using continuous shooting which, of course, means you keep your finger pressed down on the shutter release and therefore the stability of the tripod is minimized if not completely eliminated.
  • I wanted to try using a faster shutter but I was in Aperture mode and couldn't remember how to change that. I had a hard enough time trying to change to D9 AF area mode but I remembered where the AF/M switch and the push button were.
  • I ended up shooting in JPEG instead of RAW. I didn't notice that while I was at the location.

  • I wanted to take my shooting buddy, my dog Elmer. He's been a part of almost every photo excursion I've had since 2013. But he just can't keep up any longer. I actually took him to the location and tried walking with him but it was a no go. I took him back home and returned alone, in a sad mood.
  • The camera and tripod are very heavy. I must have turned into a wimp since I retired. I didn't even put on my camera bag. I just slung the camera and tripod over my shoulder. A Nikon D850, the teleconverter, the 200-500mm lens, and my Manfrotto 055XPROB Tripod.
All said, it was a learning experience. I went home to try to figure out more about how to set up and use my D850. I did notice in Light Room Classic 2 things: 1) the effective focal length is displayed - the image shows it was shot at 700mm. It must be something the camera does; I don't see anywhere in Light Room that shows there was a teleconverter involved. 2) the develop module doesn't provide a lens correction preset. It doesn't detect that I was using a 200-500mm lens. I don't know if that's because of the teleconverter, or if it was because the image was a JPEG and not a RAW. A page on Adobe's site said some presets were only available for RAW images.

Guess I've got some (re)learning to do with the camera! I'm a newbie all over!


Saturday, December 1, 2018

Test Shot: Nikon D850 + Nikkor 200-500mm f/5.6E

Nikon D850

It's a Heatwave!

I still haven't had the opportunity to get out for some landscape photography, but I did take a shot or two in downtown Phoenix using my Nikon D850 and Nikkor 200-500mm mounted on my tripod.

I went out on my lunch break and shot from the top level of the parking garage in the state government plaza area, pointing downtown.

Here's what I found...

The Setup

Nikkor 200-500mm f/5.6E
I was impressed with the weight of the D850 + 200-500mm lens, including the tripod mount on the lens and 2 quick release plates, one on the camera (it was nice that I didn't have to remove it) and one on the lens tripod mount. That is not a rig I'd want to try hand holding for very long!

After my previous shots, I tried to minimize camera shake and had changed my settings to use Mirror Up mode with Exposure delay mode (d5) = 3s, Electronic front-curtain shutter (d6) = On. I still used the manual shutter release (man I wish it worked with the IR wireless remote). With the additional delay and front-curtain shutter, I do think I got rid of a lot, if not all, of the camera shake.

The Results

Here's one of the pictures I shot. I couldn't tell you how far away the construction crane is but it wasn't next door to my location. For anyone interested, here's a link to the original raw file: https://www.dropbox.com/s/hwzgttltd0icvpk/_8500174.NEF?dl=0.

Construction in Downtown Phoenix, AZ
1/400 sec, f/8.0, ISO 64, 500mm
I have done some editing in Lightroom Classic. I added some contrast, sharpening, and luminance noise reduction.

I don't notice any camera shake, and that's the good thing. What I did notice was something I'd heard of but never seen - atmospheric distortion. You'd think that, living in Phoenix where it's just lately got below 70 degree F days, that I'd have seen it. Either I've been lucky (and, I don't really shoot much right in Phoenix) or my other bodies couldn't resolve it.

Here's a crop of the top of the building near where the crane is:

Crop of picture above, showing the heatwaves
That was an interesting result! One I wasn't expecting.

Auto Focus


I was then concerned about how the auto focus would work on something like that. In the picture above, I was using single point AF and aiming at the vertical lines on the lower right side of the construction.

I tried to verify the focus manually, using Live View. But my shaky hands made that impossible with the lens at 500mm. As soon as I touched the focus ring the image was shaking around so much that it was useless. This makes me think about getting a different tripod collar to steady things down more. I have read from others that they don't find the Nikon collar very stable and maybe I'm witnessing that.

Slow Shutter Speed


I also realize (now) that I was using aperture priority and not really paying attention to the shutter speed. I wanted to use what is supposed to be a good aperture for sharpness; f/8 is not in any of the stops. Even though I was at ISO 64, my shutter speed was not meeting the reciprocal rule and should have been sped up a bit more. I couldn't have done that without decreasing the aperture or using a neutral density filter which I don't have for that lens. But, looking at the images, I am not sure how much the slow shutter would alleviate the atmospheric impact. It might some since there would be less time for the distortion to occur.

The Bottom Line

I showed the results to my photography mentor (who now really wants his own D850) and he was impressed with how much detail there is when zooming in to the max of 32x. I hadn't thought about that - I guess I'm already taking it for granted!

I was overall pleased with the shots. No - they're not art but I'm trying to get used to a new and more sensitive camera. I'm trying to figure out how to get sharp images with it and I think these images were a good improvement. I really enjoy trying to refine my technique. Now if I could just calm down my shaky hands!

Saturday, November 24, 2018

More Nikon D850 Minutia

Comments / Notes - updated 12/1/2018

I decided I needed a place to post things I've found about the D850 that I want to point out for one reason or another. A lot of these items are likely to be differences between the D610 and D850 - comparing my previous body experiences. These are not listed in any order of importance.

12/1/2018 - Formatting the memory card deletes the settings file

I have been curious about this so tried it out. If you save your settings to the memory card in the D850 (Setup Menu > Save/Load settings), it creates a NCSETUPM.BIN file at the root of the card. If you then choose to reformat your card (), it deletes your settings file! 

When I import files from the memory card I try to also make a backup of the NCSETUPM.BIN file. Another thing to try to do is to save your settings again after formatting the memory card.

I have only tried this with the XQD card.


The Unboxing


Everyone does unboxing videos of their Nikon D850. Well, perhaps not everyone but there are a lot of unboxing videos on YouTube. As I opened my D850, I took a few snaps with my D610, but hadn't shot photos for about a year and a half and I had the aperture opened up too wide to get good depth of field and being hand held, they aren't in focus. So, here's the extent to which I'll share my D850 unboxing:


My Nikon D850 - unboxed, 11/06/2018
In one of the unboxing videos I watched, the guy (I don't think I've seen one unboxing with a woman owner - hmmm) threw his manual back in the box unwrapped (it comes wrapped in plastic). I wish I hadn't opened mine either - I won't read the paper copy. Like him, I had already downloaded the D850 User Manual from Nikon's site (~400 pages) along with the separate Menu Guide (~200 pages). I have it on my iPhone and iPad and that's where I've read it.

Likewise I won't use the D850 camera strap although I sure wouldn't be ashamed to! I am tickled with this camera and glad I got it. And that's without having even gotten out much with it. It's just satisfying knowing that I have what a lot of folks consider the top DSLR of it's time. Now if only I had the skills to go with it!

What about my Nikon D610?


My Nikon D610
I don't know what to do with my Nikon D610. My wife wants me to keep it but I don't see much sense in that. I'm not a pro, and I'm not shooting events where I must get the shot. In other words, I don't need a backup camera. Even if I did, I still have my little Nikon D3200 still.

The downside of selling them is that neither one of the other bodies are worth much. If I sold it to B&H or Adorama, they might give me $300 or so for it. The reason I've kept the D3200 is because it isn't worth much either, and neither are the DX format lenses.

I could get more selling it myself online but I hate messing with that stuff. It's a conundrum.

I'm also surprised that I could let the D610 go so easily, but I don't really have a connection to it like I do my dogs or other material things I sold in the past (like my Yamaha MO6 keyboard). I don't know why that is but I have 2 thoughts: 1) the actual camera body wasn't the focus of my experiences or memories from being out shooting, or 2) I've grown emotionally this year. Either way, I truly enjoyed what the D610 did for me and hope to continue down the same path with the D850.


Sunday, November 18, 2018

Nikon D850 - Focusing

Like learning how to focus for the first time - almost


Encanto Park, Phoenix AZ
Nikon D850, Nikkor 16-35mm f/4 @ 16mm
I went out to shoot with my new Nikon D850 last weekend and wasn't terribly happy with my results.

I was hoping, okay, expecting, to be blown away with the detail and sharpness of the better sensor. I forgot to account for the ability of the photographer!

The image at right was probably the best result I got. I was using my Nikkor 16-35mm f/4/G lens at 16 mm and f/4.5. I used the autofocus in live view, focusing on the fountain on the left of the little island. I used the self timer mode with a 4 second delay on the shutter release. None of this image seems terribly sharp to me.

On Thom Hogan's site, I had read about which lenses are recommended for the D850 and this lens is semi-recommended (the exception being that an LED used in the vibration reduction circuitry can cause "fogging" of an image). I was aware that there is some discussion about the performance of lenses with the higher resolution sensor so I was worried - was I going to have to replace all of my lenses? I hoped not.

After pondering the issue over the last week, I decided to try some additional settings.

Today I enabled the electronic front curtain shutter (Custom Setting d5). I also used the full Mup release mode. In addition, I manually focused in live view with focus peaking enabled while zoomed in at 100%. Between all of those settings, this new image looks pretty good to me.

Neighbor's Palm Tree, Phoenix AZ
Nikon D850, Nikkor 50mm f/1.8D @ f/1.8

This was taken with my lowly Nikkor 50mm f/1.8D lens, which is NOT on the recommended list for the D850 and it still looks better than any of the shots I did the prior weekend. Woo hoo! This crop does have some sharpening applied in Lightroom, but now I can see what the rig can do even with a less than stellar lens.

Here are the full size jpegs of the above images for reference:


More reflections

Wireless Remote for the D850

One thing I always did with my D610 was to use an infrared (IR) remote shutter release to trigger the shutter. The D850 doesn't have that functionality built in. The IR remote doesn't work with the D850. I've been looking for solutions and am torn about how to address the issue. For now I'll just use the Mup mode with a release delay. I really don't like having to use an attachment with a cord, and am considering the Vello FreeWave Micro Wireless Remote Shutter Release - it has a receiver that plugs in to the 10 pin connecter and doesn't need a cable flopping around.

XQD Memory Card


I have been using a new Sony XQD G series 64G memory card. It's fine and should hold around 589 images at 14 bit lossless compressed (~45 Mb per file for the files I've taken so far). The burst rate of the camera at 7 frames per secong (FPS) is pretty cool and impressed my friend Jon.

However, during my photography hiatus, SanDisk and others have come out with some new UHS-3 SD cards that are impressive for that format - they have write speeds around 250-300MB/s! They're somewhat cheaper than the XQD cards too.

However, since most of what I have shot is landscape, I really don't need to use burst mode to try and freeze a mountain or valley or tree. Consequently, my 95MB/s SD cards work just fine. Getting the XQD was not really necessary, and it also required me to get an XQD card reader. 

Thursday, November 8, 2018

It's Here!

Just a quick post -

I ordered my D850 from B & H last Sunday (11/4/2018) and got it the following Tuesday (11/6/2018). Now that's service! I was sick and didn't get to do much with it except unbox it.

Today, 11/8/2018, I got my Sony 64 G XQD G series card. I shot a few pics and got them transferred to my PC using my new Sony XQD USB Adapter.

The pics were bad (taken indoors with no flash) so I'm not going to post them.

I was happy to get the ingest chain working again since I haven't done any photography for almost 2 years. That was the good part.

The bad part, kind of, is that I have forgotten how to use my software. I figured out the Nikon Transfer 2 that I use and have liked (I may look for something else but it does what I want - allows me to rename and to copy to 2 destinations so I get my backup at the same time). And, now that I'm using USB 3 for reading from the card, it was faster than off the SD cards even with about 45M files.

Lightroom, Photoshop, and Adobe Camera Raw (ACR) were different stories.

In Lightroom, once I imported the files, the images wouldn't show up in the Develop module. I found a solution on Adobe's web - you have to disable using the graphics card.

When I opened the image in Photoshop and ACR, I realized I don't have any of my old settings any longer. Part or all of that is because I swapped out my main hard drive a year ago for an SSD and re-installed all of my software including the Adobe stuff.

So now I've got some work to do in addition to learning the D850 - I need to re-learn the Adobe software. I've been paying for the CC software for almost 2 years now without using it so this will be a good thing and I'm actually getting excited about it. It's like I'm a New Photographer all over again!

Sunday, November 4, 2018

I've done it now! My D850 is on order!

Now for the hard part!

Nikon D850
I've just placed my order for a Nikon D850 from B&H (body only). Now I have to try to be patient for it to arrive!

I was poking around the interweb the last day or 2 and decided to look at the B&H site for the D850. I was surprised to see that they had them in stock and were offering free next day delivery! Now I could order it and have it in my hands in a few days!

Decisions, decisions. My wife convinced me to pull the trigger (she'd just spent more money on a horse trailer) and now it's on order.

Woo hoo!

I held off on ordering an XQD card for now - I've got SD cards and for what I shoot I really don't need the extra speed. Once I find I do need the speed of an XQD, I'll order one or more along with a card reader.

I've already been reading the D850 manual for a while; now I'll have to order Thom Hogan's D850 Guide. I liked his D600/D610 guide and know his guide will have a lot of great information. I even made my D850 purchase after clicking through on his affiliate page! Note that I'm not associated with Thom, I just like his technical approach and thoughts.

Now - what to do with my D610?

Wednesday, August 22, 2018

5 Year Anniversary

I can’t believe it’s been 5 years since I started my photography hobby.


Elmer and I at Marshall Lake, Arizona
I can still vividly remember my “drive about” trip I made with my dog Elmer around my birthday in 2013. I’ve described it before, but basically I took a little Canon point and shoot and my cheap tripod and had a blast taking picture after picture (in JPEG format - the only format the camera shoots in).

When I got home I decided to get a better camera and drove to the local Best Buy. Nikon’s were on sale so I ended up getting a kit with a bunch of stuff that was of little value. It was very exciting - a whole new world full of acronyms and things to learn.

For the next few years I would spend almost every weekend going out with Elmer, camping somewhere and taking photos. In less than a year I moved from my entry Nikon D3200 to a full frame Nikon D610 and some full frame lenses. I shot in Arizona, Utah, California, Oregon, and Washington. I printed some images and hung them on the wall as well as gave them as presents.

The Thrill is Gone


Sometime in 2017, for some reason, I lost my desire to go shooting. I shot a few photographs on January 1, 2017 and that was it for the year. Here it is in the middle of 2018 and I still haven’t shot much and nothing worth keeping.

To make a long story as short as possible, I have been dealing with severe depression and have struggled to overcome it. I think I’m seeing the light at the end of the tunnel but it’s been a hard road to navigate. I started writing a diatribe about my depression but it was getting too depressing so I stopped.

That Old Time Feeling


Nikon D850
In the last week or two I’ve finally started getting interested in photography again. I’ve started wanting to go out shooting. I haven’t done much yet because of the heat and the fact that I have used all of my time off dealing with my illness.

Lately, again over the last couple of weeks, I’m really looking at getting the new Nikon D850 - not so much as a way to improve my photography but as a hope to motivate me to get out and maybe just re-shoot some of my favorite things and places in Arizona with the more detailed sensor. I have been mildly interested in it, mainly from a curiosity aspect, since it came out in 2017. 


Recently, however, I’ve been a mouse click away from placing my order - I’ve had it in a shopping cart more than once. Even now, as I write this, I want to get mine on order!

The bottom line for me now is that I have fond memories of photography and I want to get back to it!

Monday, October 23, 2017

Backpacking Gear #3 - Enlightened Equipment Revelation

My Quilt is Here!


Enlightened Equipment Revelation
My Enlightened Equipment Revelation 20 Degree Quilt arrived today. It's amazing how light the shipping box was. It's like I bought some air! I did try to weigh it on our bathroom scale but it wouldn't register. I weighed it on my little kitchen scale and it weighed as advertised - 1 pound 3 ounces.

It arrived stuffed into its storage bag. They supply both a storage bag, where the quilt is not compressed very much, along with a stuff sack more suitable for use in a backpack. The stuff sack does not compress the quilt to the maximum extent possible; I've seen videos of other people getting a compression sack to store it in for the pack.

It did loft up after I took it out of the storage bag. I sat it on my torso and quickly heated up under it. Note, however, that I'm in Phoenix and the air conditioning was set to 76 degrees Fahrenheit so it's not like it was freezing anyway. (Yeah, we're still using the air conditioning at only a week or so away from Halloween.)

I like the way the fabric feels. It's synthetic but it's very soft. I am hoping to try it out this coming weekend at Mt. Lemmon near Tucson, AZ.

The pictures below show what the quilt looks like in both of the bags with a beer bottle for size comparison. The text on the storage bag is washing instructions (like I'll ever wash it, ha ha).

Enlightened Equipment Revelation
in the stuff sack

Enlightened Equipment Revelation
in the storage sack


My Backpacking Gear


I think I'm done getting stuff. The party's over. Now it's time to hit some dirt. My last post went over my gear. The only thing I'm still up in the air over is my puffy jacket, either keeping the Outdoor Research Transcendent Down Hoody that I've got or to keep the Mountain Hardwear Ghost Whisperer Down Jacket that I've ordered and is coming soon.

That said, here's a picture of my pack with everything in it and then with everything out. I weighed it the best I could on the bathroom scale at 18 pounds 13 ounces. That's actually with a little food in it, but not with the jacket in it. But still, I'm looking at about a 20 pound pack which is pretty good!

My Gregory Baltoro 65
Loaded

My Gregory Baltoro 65
Unloaded
In the picture above you'll see these items: 
  • Gregory Baltoro 65 backpack with Paliston Caribiners
  • Map of Mt. Lemmon 
  • 1 full change of clothes in the red dry bag 
  • Big Agnes Fly Creek HV UL2 3-Season 2-Person tent
  • Enlightened Equipment Revelation 20 Degree quilt
  • Various food items in the yellow dry bag
  • Outdoor Research Transcendent Hoody
  • REI Flash Insulated Sleeping Pad
  • 750 pound capacity paracord and OLight charger in the blue dry bag
  • Sawyer water filter in the mesh bag
  • Snow Peak cooking pot containing my Toaks folding spork and BRS 3000T stove
  • MSR fuel canister (peeking out from under the puffy jacket)
  • Marmot Precip hard shell jacket
  • Tyvek tent footprint
  • Empty bags for trash, etc.
  • Toiletries and first aid
  • Black Diamond Trail Ergo Cork Trekking Poles
  • Suunto compass
  • OLight S1 Flashlight
  • Leatherman Signal Multi-Tool, and finally, the 
  • Therm-a-Rest Z-Seat Pad.

Some Links I've found useful


I'd like to provide some links to at least some of the sites or YouTubers that I've found useful while gathering these goodies. I've spent a lot of time looking at reviews from both review sites as well as from people that have bought and used the gear, and I appreciate the information they've provided so that I hopefully didn't buy a lot of stuff I don't need or which is of inferior quality. 

In no particular order, I like these websites or backpackers listed below. I've looked at a good number of other sites too but I find these sites have good prices, good reviews


Sunday, October 22, 2017

More about Backpacking Gear

Off the Photography topic...


Like my last post, this isn't directly related to photography but my plan is that it will become what enables me to get better shots: backpacking. I am spending time researching and acquiring some backpacking gear and thought I'd share more about it.

You can view my gear list at: https://lighterpack.com/r/a2e9f9

The Big 3

Backpack
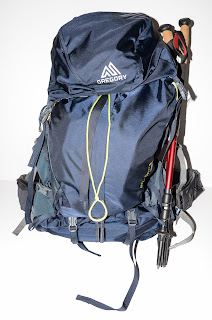

My Gregory Baltoro 65 and
Black Diamond Trail Ergo Trekking Poles
As I mentioned in my last post I've selected the Gregory Baltoro 65 backpack. It is a large capacity (not the largest), and probably larger than required for a 2 night trip which I'm likely to take (Friday and Saturday nights on a weekend). But, I should be able to pack in camera gear.

It's also heavy compared to the pack I see experienced backpackers gravitating to, the ZPacks Arc Blast or one of the other ZPacks backpacks. I am REALLY tempted to switch to one of those. The Arc Blast weighs 21 ounces - 1 pound 5 ounces - compared to the 5 pounds 8 ounces of the Baltoro 65, a savings of 64 ounces (4 pounds)!

As I order equipment and fill up my bag, I am still wishing it had an additional web pouch on the back like the Osprey packs, as well as the trekking pole attachments. ZPacks offers some trekking pole attachments which I may pick up down the road once I actually get out of my house and onto some dirt with the pack.

The other thing that ZPacks offers that I may try to integrate is large hip strap pockets. The pockets on the Baltoro are not very spacious. I put my new Suunto compass in one of the pockets and it about fills it up.

I also don't know where to put a map. None of the pockets seem logical to me for storing a map. The lid pockets aren't really big enough unless you fold the map (which is okay but seems cumbersome). I've kind of decided to use the large back pocket for the rain gear sorts of stuff (that's where the included back rain cover is) so it doesn't seem logical for also storing a map in.

Shelter
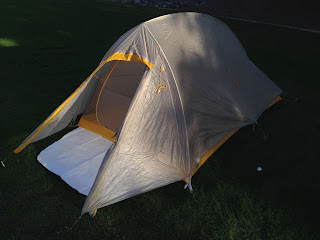

My Big Agnes Fly Creek HV UL2
I've also already mentioned my shelter selection, the Big Agnes Fly Creek HV UL2 3 season 2 person tent which weighs 1 pound 15 ounces.

I've received my copy, from SteepAndCheap.com, where I got it for a really good price. When you're looking for backpacking gear I recommend checking that site out. They're apparently a discount / closeout site for Backcountry.com and you can find really good deals there similar to the REI Garage.

I made a Tyvek footprint and left some ground covering in the vestibule which I can fold under the tent's bathtub in the event of rain. I got a great price and quick service on the Tyvek from AntiGravityGear.com and recommend them too.

The Fly Creek does not come with enough tent stakes for all of the fly outs and other anchoring points. I'm still mulling over whether I want to get additional stakes and if so, what type.

Sleeping System
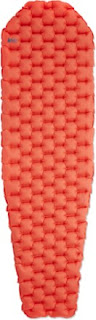

REI Co-op
Flash Insulated
Air Sleeping Pad
For my sleeping system, also mentioned previously, I've opted for an Enlightened Equipment Revelation 20 Degree quilt with the 850 DownTek fill, regular length / wide, Navy on the outside and Red on the inside, weighing 1 pound and 1 ounce. Also as I mentioned before, I bought a custom made version (as compared to off the shelf). I ordered mine on October 9, 2017 and it will be delivered tomorrow, October 22, 2017. That's a 2 week turn around and I'm not complaining. I am getting exactly the quilt I ordered! I'll try to post a picture of it once I have it in my normal sized hands.
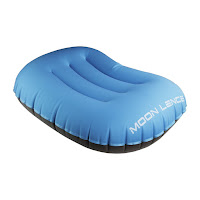
Moon Lence Pillow
Along with the quilt, I decided on the REI Flash Insulated pad in the wide width like the image on the right, weighing 1 pound 3 ounces.

To finish off my sleeping system I also added a Moon Lence Ultralight Inflatable Travel/Camping Pillow from Amazon, weighing in at 2.8 ounces. I was turned on to this by Darwin On The Trail. He's given me a lot of good tips.

I think I'm set for getting some good sleep if I ever get out on a trail. But even if I don't backpack I know I can still use this gear when I stay in the back of my Explorer!

Kitchen / Cooking System


You can't go out overnight without eating. Or at least I can't. But, I don't want to eat gourmet; I want to eat anti-gourmet or at least light weight. Here's what I've boiled things down to (poor pun intended)...
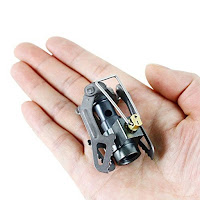
BRS 3000T Stove
I switched from my Primus stove to the BRS 3000T Ultralight Mini Camping Stove, which weighs in at a whopping 25 grams!
I can't believe how small and light this stove is compared to my old (1 year old) Primus!

It is a canister stove so I'll still need to carry a canister or two but such is life - at least until I switch to an alcohol system or to just eating cold food.

Snow Peak Mini Solo
Titanium Cookset
I am sticking with my Snow Peak titanium pots for the time being, mainly because I still have room in my pack and they're not terrible anyway, which tip the scales at 5.5 ounces. Snow Peak apparently no longer makes the model I have with a 28 fluid ounce pot and 10 fluid ounce cup, but I found it at OMCGear.com if you're interested (probably not because they want $65.95 for it).

This pot is supposed to be able to carry the small canisters in it but I don't have any that fit. Nor do I have a cozy to aid in fuel optimization - I plan to work on that once I start getting out.
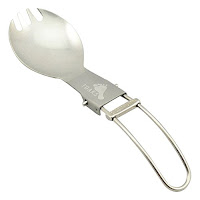
Toaks Titanium Folding Spork
I'm not convinced I want to get down to a single pot like other, experienced backpackers do. I think I want to continue to be able to eat my oatmeal from a pot while having some coffee at the same time. But we'll see...

And finally, I upgraded my spork to a TOAKS Titanium Folding Spork that weighs an almost invisible 0.6 ounces. My old Snow Peak spork wouldn't fit inside my cooking pot but this one does.

FYI, I was turned on to this by Jason from Outdoor Adventures. Thanks! He's got a lot of good information on beginning backpacking. He's the one that has me thinking about going to a single pot but he still carries a collapsible cup too, so, as I stated, I'm not jumping at that change yet.
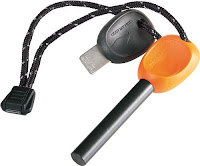
Light My Fire Firesteel 2.0

To start my stove I have a butane lighter as a backup for my cool little Light My Fire Swedish FireSteel 2.0. I've been using this for a bit and just love it! I'm not worried about wet matches, a lighter that won't light, or a lighter that leaks. This thing is cool!

I also added a couple of LOKSAK OPSAK 12" x 20" bags to help with the anti-bear and other critter fight. I haven't really used them so don't have much to say about them.

Clothing

I think I'm set for clothing although I'm still working on a jacket. I've talked about my clothing before in posts from a year ago but thought I'd add some new items here...

Jacket 
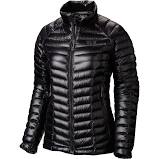
Mountain Hardwear
Ghost Whisperer

I bought a Outdoor Research Transcendent Hoody but it's an athletic fit and is a bit snug around my less than svelte stomach; it's hooded with an untreated 650 fill goose down and weighs 15.4 ounces. I've ordered a Mountain Hardwear Ghost Whisperer to try it out; it's also hooded and is Q.Shield treated 800 fill down jacket that weighs less than 8 ounces. If one of those works out I'll send the other one back. If neither work out then I'll have to guess which one I'll be able to fit into the soonest. I think I like the OR jacket better due to the additional pockets and adjustments but if it doesn't fit as well then I'm facing a conundrum.

Shirts
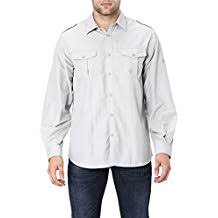

Trailside Supply Co. Long Sleeve Shirt
I had been wearing Wrangler shirts that I like a lot. They're a synthetic / cotton blend, long sleeve, button down shirt that I think look good. However, I wanted full synthetic but wasn't enthused about spending the money for shirts from Columbia or other manufacturers. 

I stumbled on this Trailside Supply Co. Men's Standard Quick-Dry Nylon Breathable Convertible Long Sleeve Fishing Shirt on Amazon and really like it. I see the price has gone up since I got mine for $US 22.71 but they're still cheaper than Columbia or others.

Other


As mentioned before, I'm using these items: 

  • Black Diamond Trail Ergo Cork Trekking Poles
  • Vasque hiking boots
  • Darn tough socks with Fox River sock liners
  • Ex Officio under garments or unmentionables
  • Terramar long johns (top and bottom)
  • Columbia Silver Ridge Convertible britches

Other Goodies


Besides the major systems mentioned above, here are some of the other goodies I've added.

Navigation
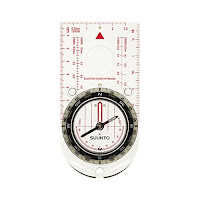

Suunto M-3 Compass
I have considered a GPS but somewhere I read that if you think you need a GPS then you'll also want a backup because a GPS runs on batteries. And if you need a backup, then why carry the GPS in the first place - just get, and learn to use, a map and a compass.

I used maps a lot in the Navy (where we called them "charts") and am comfortable with them, if a bit out of practice. So I did a bit of research and decided to get a Suunto M-3 Compass. I don't need the "global" compass, or if/when I do, I'll get it. Otherwise, this compass gets high marks for accuracy and durability.

As for maps, at the Ranger station on Mt. Lemmon I have picked up a nice map of the are by Green Trails Maps which I plan to use to hone my map navigation skills once I start camping there..

Lighting
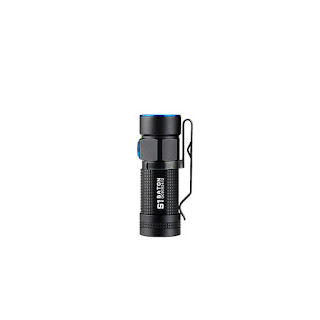

Olight S1 Baton Flashlight
I have tried to use a headlamp but I just don't like them. I don't like the strap but more importantly I don't like the way they reflect in my glasses, and I have to wear glasses in order to see. Thanks to Darwin On The Trail, I've switched to the small Olight S1 Baton flashlight that clips to a ball cap and weighs 1 ounce.

This flashlight has 5 modes, a magnetic base to mount it to anything with some iron in it. The only thing I wish it had was a red lens.

And even though the size is small, it can put out 500 lumens or more! I say "or more" because some literature I've read claims it can put out 600 lumens.

At the time I got mine from Amazon I also included a 2-pack of the higher output and rechargeable 14500 batteries which weight 22.7 grams each. I was hoping I could recharge them with my charger but in the end I decided to also get their portable magnetic USB charger that weighs 20.5 grams.

The total cost for this system is $US 61.80, not including tax and shipping, but it is really powerful, well built, and rechargeable. I don't think I'll need another flashlight. I already know I like the flashlight but I haven't actually worn it clipped to a ball cap yet.

Paracord / Bear Hanging
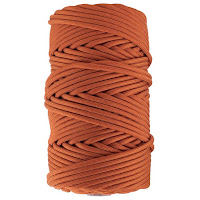

GOLBERG 750lb Paracord
If/when you're in bear country you're supposed to hang your food bag, and any other items that have bear attracting odors, from a tree. ZPacks offers a kit for this but I chose to make my own. I decided to get some paracord that could be used for other purposes such as helping get someone up a hill if they fell down (like the scene in the movie "A Walk in the Woods" near the end).

I selected 50 feet of a 750 pound capacity orange paracord from Golberg which weighs an incredible 4 ounces. I had picked some paracord up from WalMart but it wasn't rated as strong, weighed more, and was bulkier. I like the Golberg paracord much better.

I also needed a caribiner for the bear hang. Again I had some cheap WalMart caribiners but found out that they can twist in the wind making it impossible to retrieve your food if you've hung it using the Pacific Crest Trail method.
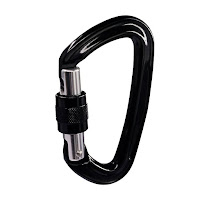
Paliston CE 25kN Locking Caribiner
I decided to get a caribiner that 1) was locking so that the issue with the twisting didn't happen; 2) the locking nut was knurled to grip easier if it gets wet; 3) had the strength capacity to work to help haul someone up a hill. That meant I needed a locking caribiner rated for climbing.

I found a great price for a pack of 3 Paliston CE 25kN(5600lbs) Ultra-Light Locking Climbing Carabiner that are wonderful. Each caribiner is made of aluminum, is about 3.9 inches by 2.4 inches, are rated for 5,600 pounds (that should hold me, even with some bouncing), and weighs just under 2 ounces. I originally thought I'd end up with only 1 on my pack but these are so light and sturdy that I'm not going to bother with any of the cheaper caribiners and will just use all 3 of these.

I also have a small mesh bag like the one in Jason's video and use some dry bags to store my food and other items.

Therm-a-Rest Z-Seat Pad


I read a while ago that every outdoorsperson has to have at least one piece of North Face gear and I think the same is true for backpackers and Therm-a-Rest. Here's my obligatory piece, the silver and yellow sitting pad.

I've only tried it out on my bedroom floor so far so I can't say how much it really adds to the sitting experience.

I can say that I don't think I'd like to have only this material for sleeping on. However, since I hope to camp on the Arizona desert floor at some time, I may get one of these to stick under the REI Flash pad mentioned above in order to keep thorns out of the inflatable pad.


Leatherman Signal Multi-Tool
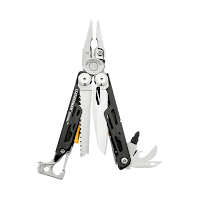

Leatherman Signal
I got the Leatherman Signal a couple of months ago, weighing 7.5 ounces, and really like the quality of this tool. I thought it made sense for backpacking. However, since getting it, I wish I'd opted for a Wave instead.

The main reason is that on my Victorinox Super Tinker, which I've had for probably 20 years and weighs only 3 ounces, the main things I use are the scissors and the small knife blade, in that order. I also use the toothpick a lot.

The Leatherman Signal doesn't have scissors but the Wave does. This means that, with the Signal, if I want to have some scissors with me I need to also carry my Victorinox and if I have to carry it then why do I need to carry the Leatherman? Another conundrum. I can't send the Signal back now, either. And I don't feel like shelling out another $100 or so for the Wave. Hmmm...
Monday, October 9, 2017

Woohoo! New Gear!

A Nikon D850?


Okay, it's not a Nikon  D850 (at least not yet), but I'm getting some new gear to help motivate me to get out and take some photographs. At least that's the plan.

I've really lost the motivation to shoot this year. I shot a few photographs at Saguaro National Park on January 1, 2017 but haven't done anything since. Well, that's not quite true. I took a trip with my son in July to northern Arizona where I shot some snaps with my iPhone. But nothing to speak of with a DSLR since New Years Day. And that's including my first visit to Antelope Canyon!

So what is this new magically inspiring gear? I'm getting into backpacking. It's a whole new world and one that I hope will get me back out in the wilderness with my camera.

I know the rest of this blog isn't about cameras but I hope you find this somewhat interesting; my plan is to have backpacking equipment that will allow me to take photography gear to places I wouldn't normally get to. Places that are more than 20 steps away from a parking lot. And if it inspires me to just get back outdoors, that alone should also lead to some more photographs. Even if they're just of me and my trekking poles!

Backpacking Research


My Gregory Baltoro 65 and Black
Diamond Trail Ergo Cork Trekking Poles
I always enjoy researching the technical aspects of something once I get attracted to it. That includes woodworking, baseball, photography, and now backpacking. The interwebs certainly provide a lot of information and some of it is good and useful! I've found a lot of sites that I'm using to get an understanding of the backpacking gear as well as comparisons between manufacturers and models.

In backpacking they talk about the different major "systems" of your equipment: backpack, sleeping system, and shelter (I used to call it a tent) are the "big 3" systems. I have made my purchases of the big 3 along with a few of the smaller items.

For a backpack I selected the Gregory Baltoro 65. It seems like a good size, perhaps a bit overkill for weekend hikes, but I will be packing my full frame Nikon D610, maybe 4 or 5 lenses (I haven't figured out how to take the AF-S NIKKOR 200-500mm f/5.6E ED VR lens yet). And, I also need to strap on a tripod! I won't have to carry film, however.

I was torn between this pack and the Osprey Atmos AG 65 but ended up going with the Gregory because of its "A3" suspension. Either of those packs are top of the line, although they aren't what is referred to as "ultra light" gear. I got the medium (after being properly fitted by the REI folks in Chandler, Arizona) which tips the scale at 5 pounds and 1 ounce. You quickly learn how important weight is when you start researching backpacking gear.

Sleeping on it


Enlightened Equipment
Revelation Quilt
I found a website that I like as a great starting place for comparing gear, called OutdoorGearlab.com. When researching a sleeping system - which means some sort of sleeping bag and an air mattress until you start using bigger terms for common articles - I decided to get a product from a company in Minnesota called Enlightened Equipment.

At Enlightened Equipment, you get to decide what options you want such as color, temperature rating, fill and weight, and then you order the item they make it for you and send it to you so it can take some weeks before you get it. I chose what is called a "quilt", their "Revelation" model and it's on order. It's a real custom quilt!

I ordered a regular length, extra width, 20 degree with 850 down quilt. I ordered Navy on the outside with red on the inside. It should weigh about 1 pound and 4 ounces. I can't wait to get it although I'm contemplating changing it to a 10 degree bag which they allow you to do if they haven't got it completed by the time you call them. How cool is that? I wish I could get a Nikon D850 with 2 XQD cards! Or with zero video capabilities!

With this type of sleeping "bag" you really need a decent air mattress. I've decided on the regular / wide REI Co-op Flash Insulated Air Sleeping Pad. It has an R factor (insulation property) of 3.7 which is pretty good, especially for the price. It weighs 1 pound and 3 ounces. Compare that to my other REI pad that I use in my Explorer - it weighs 6 pounds and 3 ounces! Almost 6 times as much!

Gimme some Shelter

Big Agnes Fly Creek HV UL2 
And for my shelter, I also was swayed a lot by the Outdoor Gearlabs site. I got an inkling about this tent from that site and then found a lot of positive reviews from others that have the tent so I've got it on order: a Big Agnes Fly Creek HV UL2. This is what they call a 3 season tent, meaning it's not designed to handle heavy winter camping in the snow. It's also called a 2-person tent meaning it should sleep 2 people. I've seen videos where it takes a whopping 2 or 3 minutes to set the tent up! It bursts the scales at 1 pound and 15 ounces! I'm adding some titanium stakes to cut that down a bit...

I'm okay with this tent but I'm questioning it on the following two points and may end up going a different route...

1. My wife has decided that she wants to get involved and I've read a number of reviews that say it's cramped in this tent with 2 people.

2. I've found out about a tent I really kind of want but I'm having a hard time justifying the price right now. It's the Zpacks™ Duplex Ultralight Two Person Tent. This tent just seems amazing and it should for $600! It's made out of a tough material called "Dyneema Composite Fabric" (also known as "Cuben" fiber). The entire tent weighs in at 1 pound and 5 ounces! Part of the weight saving is due to it using trekking poles for supports instead of separate tent poles. Maybe someday I'll get it...

The Big 3


My total weight for the Big 3 is (or will be when I get it all) is 5 lb 1 oz for the pack, 1 lb 4 oz for the quilt, 1 lb 3 oz for the pad, and 1 lb 15 oz for the tent, for a total of 9 lb and 7 oz! Even I should be able to handle that! And, it helps make up for the camera gear weight!

Monday, July 24, 2017

Chiricahua Camping Trip - Post Mortem

We Went, We Saw, We Left


Chiricahua National Monument
NPS Photo
Well, we did make it to the Chiricahua National Monument a couple of weeks ago. I got a site at the Bonita Canyon Campground for 2 nights. We got there late Friday night and I put up our brand new tent in the dark, using the Exploder's headlights.

It was still toasty when I was done at about 10PM. It must have still been about 90 degrees Fahrenheit  warm. It took us forever to fall asleep. It didn't get cool (and by that I mean maybe 70 degrees or so) until about 4 AM. When we climbed out of the tent around 6 AM or so we did not need a jacket, which was what we were hoping for.

By 8 AM it was already too warm to enjoy sitting at the camp site so we piled in the trusty Exploder and drove up to Massai Point. We drove to the other 2 parking areas up there before heading to the visitor center. I got my National Park Passport stamped, signed the registry, and we bought some souvenirs. We then visited Faraway Ranch before heading out of the park.

My wife was interested in the Willcox Playa because I have talked about it. So, we took the long drive completely around the southern end of the playa, through Sunizona and  Pearce / Sunsites after turning south onto Highway AZ 181 from the park entrance and then to Highway US 191.

At the crossing over the railroad track, about 4 miles south of Interstate 10, we decided to get off of the pavement and followed the road alongside the railroad tracks a bit. We hit one wash where the Exploder got pretty sideways; wifey thought she was going to be hitting the dirt after we rolled over. We made it past, and we made through there again on the way back. That turned out to be the most exciting part of the visit.

We took Interstate 10 back to Willcox, got a burger at the MacDonald's to eat at the town park, then headed back to the campsite, arriving there in the early evening.

We tried to stay through the night but after many debates, at about 9:30 PM we decided to pack it up. Again, in the dark, I broke the tent down and loaded the Exploder. We were out of there by about 10 PM. We got home about 2:00 PM.

I hadn't got a camera out of the bag the entire trip. I didn't even take a cell phone picture. I just didn't feel it. I didn't have the motivation to position myself anywhere for a sunrise or sunset picture. I didn't end my photography funk. I am glad I went; I always like the Chiricahuas. But, I wish I'd found inspiration to get my Nikon D610 out of it's bag!

Thursday, July 6, 2017

An Uphill Battle. Again.

Stairway leading to the Grand Canyon Lodge
North Rim, Grand Canyon National Park

Some Familiar Things Aren't

Here it is in July, 2017 and I have been ignoring my photography since January, 2017. It's not that the photography did anything bad to me, I have just been involved in software development and that has taken precedence over my photography. I've been spending my evenings and weekends studying new software development technologies.

I've missed getting out with my camera, though, and it's never far out of mind. I've got a weekend trip planned to the Chiricahua National Monument that I'm using to kick off my new plan.

Last night I decided I'd charge all of the batteries for my photography gear. Wow. Two batteries each for two cameras. Update and charge the Tether Tools Case Air. Charge the tablet, the Kindle, the portable USB power supply, the RavPower File Hub. I'd forgotten all of those things (could be due to my age).

As I was charging things I did a bit of cleaning. Not that anything was that bad; I'd cleaned things after my last outing to the Saguaro National Park in January. As I was handling my cameras, I couldn't help but wonder about how much I'd remember once I was out trying to shoot a picture. Sure, all the buttons looked familiar and the Nikon D610 still feels good in my paws, but could I still take a picture?

Hit the Trail More Often

Start of Transept Trail
North Rim, Grand Canyon National Park
Until I lose my desire for studying software development, I'm going to at least limit it to the weeknights and then I'll get out on the weekends to return to my photography excursions. I'm hoping that this plan will provide a balance that I think I've been missing. I really enjoy getting out of the house but my computer has enticed me to stay inside.

I have to admit, however, that I also feel like I may be burned out on shooting desert landscapes in Arizona. I am going to try to figure out how to overcome that. There is a lot that is interesting about Arizona, that you don't see anywhere else, so it shouldn't be hard to keep interested. I think that what I need is a different perspective.

Striving for a Fresh Start

I have continued to watch photography related videos, as well as reviewing my photographs. One thing that I've noticed is that it takes more and more to "wow" me with a photograph. They all kind of blur together for the most part. I really want to create images that are striking, different. But what does that mean and how can I accomplish that?

One thing I know is that I really want to be more minimalist. I want to focus on one or two things in the image and not present a big confusing mess. Even the images of Bryce Canyon seem cluttered. Tony and Chelsea Northrup recently had an image on one of their photo review YouTube videos with a shot of the ocean, some "God Rays" where one of the rays was pointed at a small and solitary sailing boat. I really liked the simplicity. I want to try to shoot more like that, or at least that sort of clear vision. Perhaps that is due to also enjoying the conciseness of the new C# programming language constructs!

For starters, though, I am at least going to just try to get back out of doors. This picture below is of one of my favorite memories from the last few years of photography. It's nothing special but I just loved sitting in that meadow along Arizona State Route 67 between Jacob Lake and the North Rim of Grand Canyon National Park. Me, wilderness, warm sun, my camera. I can't wait to get back!

Me and my Nikon
Near Forest Service Road 611 and SR 67
October 7, 2015