Showing posts with label Nikkor. Show all posts

Sunday, October 23, 2016

Nikkor 200-500mm f/4E Image Quality, continued

Testing the Lens


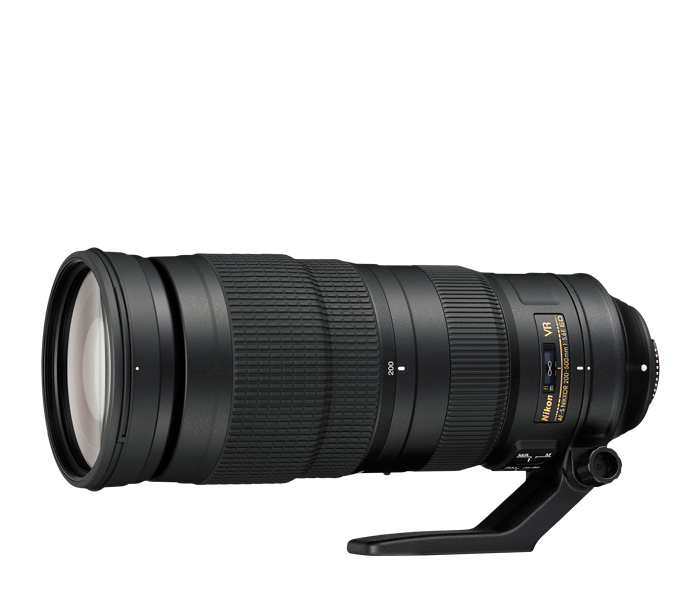
Nikkor 200-500mm f/5.6E
I went outside to my back yard a couple of weekends ago, at mid-day, and shot some sample images from my 200-500mm lens at different apertures and focal lengths. I had two goals:


  1. Try to be more scientific about knowing my lens – which apertures provide the sharpest images at which focal lengths. 
  2. Try to mark the lens for focus at infinity at a known f-stop so I could photograph the upcoming Hunters Moon that night. (http://earthsky.org/astronomy-essentials/everything-you-need-to-know-hunters-moon).


I don’t have much that I can see or shoot a photograph of from my back yard that is very far away. I settled on a power transmission tower that is about 1,000 feet away. I’m not convinced that it is enough of a distance to make much of a determination from so I’ll have to re-do my tests with a better subject.

Considerations for Depth of Field


According to my DOF calculator, using 500mm at f/5.6, the far end of the focal range is 1,290 feet; I want to go to infinity for the distant sky photography. Even at f/8 the far end is only 1,450. I need something at about 3,300 feet to get the far end of the range out to infinity using f/5.6.

But, what I did shoot may tell me something about the lens performance at this shorter range… Okay, it really didn’t. When I pulled the images in to Lightroom I honestly couldn’t see much difference between any of the shots as far as sharpness is concerned. That means that either my eyes aren’t very good or all of the shots were equally crappy. I think it’s more of the latter.

I noticed that while I was zoomed out to 500mm that the tower was really jiggling in the viewfinder. I had my camera on my tripod sitting on my patio. I don’t get where the vibration was coming from. I took some of the shots at 1/500 second and some with 1/800. I didn’t notice what looked like motion blur in any of the images but they also didn’t look terribly sharp.

Adding weight to the rig


I tried some of the images after suspending a gallon of water from the tripod to see if that helped (a gallon of water weighs about 8 pounds). It didn’t make any improvement that I could detect.
Another thing I noticed is that there was atmospheric distortion. Without looking through the viewfinder I could see heat waves between my location and the tower. I could see that in some of the images too, where the arms of the tower were distorted.

The bottom line for my experiment is that none of my images looked terribly sharp. I hope to try again soon with a more distant subject in a colder location like Flagstaff, Arizona. I also want to try getting some sort of bean bag or something to place on the lens to try to dampen vibrations.

In the meantime, I've uploaded some of the images here. You can click on them to see the full size. These were exported from Lightroom with White Balance set to Daylight, Tone Curve set to Medium Contrast, Lightroom sharpening set to 50, Detail @ 50, and Masking @ 50. Lens corrections were enabled. Camera Calibration was using Camera Neutral v2. All other settings were zero, default, or off.

These images are at 480mm and 300mm, avoiding the limits at either end of the lens. They are at apertures of f/5.6, f/8, f/11, and f/16.

Focal Length at 480mm


Nikon D610 + Nikkor 200-500mm at 480mm, f/5.6, 1/800s, ISO 100

Nikon D610 + Nikkor 200-500mm at 480mm, f/8, 1/800s, ISO 100

Nikon D610 + Nikkor 200-500mm at 480mm, f/11, 1/800s, ISO 100

Nikon D610 + Nikkor 200-500mm at 480mm, f/16, 1/800s, ISO 100

Focal Length at 300mm


Nikon D610 + Nikkor 200-500mm at 300mm, f/5.6, 1/500s, ISO 100

Nikon D610 + Nikkor 200-500mm at 300mm, f/8, 1/500s, ISO 100

Nikon D610 + Nikkor 200-500mm at 300mm, f/11, 1/500s, ISO 100

Nikon D610 + Nikkor 200-500mm at 300mm, f/16, 1/500s, ISO 100


Sunday, September 18, 2016

Yosemite National Park Day 2 - The Valley

At 4:50AM on Tuesday, September 6, 2016, I woke up in Yosemite National Park at site #410 in Crane Flat Campground. Or, it could have been heaven. I wasn't sure at first. At least not until I started getting moving and had to deal with the bear container. And, I think I had been grinning all night.

It was 51 degrees Fahrenheit with clear skies. The sky was light but the sun wasn't in sight - it was the perfect time to get going!

I got dressed, brushed my teeth, and left the campground as stealthily as I could. I went to the Crane Flat Store and filled up with fuel. That's a good time to take care of that - there was only one other person fueling at that time of day. The other times I'd pulled through the store it was busy as heck. There wasn't any other fuel for maybe 50 miles so the Crane Flat Store always had a waiting line - for fuel as well as the store itself, the pay phone, and the restrooms.

Half Dome from near Curry Village
I left the store and headed east on Big Oak Flat Road towards the valley for my first time. I thought I'd hit Glacier Point but after merging on to El Portal Road and the Southside Drive, and then getting to the fork in the road with Wawona Road, I decided to go get my Half Dome shots instead and didn't take the turn.

I drove to the end of the valley, driving through Curry Village and both Pines Campgrounds and discovered there weren't any great shots of Half Dome from there. I went back to the meadow where Curry Village Drive intersects with Happy Isle Loop Road and parked the Explorer. I got a few shots from there of Half Dome and the meadow. I really planned to go back there sometime to walk around the meadow or hopefully even the Mirror Lake Trail but never did make it. I guess that'll be for another visit.

Looking North at the valley near Curry Village
When you look at Half Dome from that meadow it's hard to tell the scale. The meadow (well, Curry Village) is at about 4,000 feet elevation. The top of Half Dome is at 8,839 feet, approaching 5,000 feet or just shy of a mile higher than the valley and almost straight up from the valley floor. Impressive!

This shot of Half Dome isn't great. The sky was clear with the sun behind the mountain. I tried editing it to get some blue to come out but no luck. And, the granite has a blue cast. I'll have to work on it...

I didn't think that the sunrise was going to much good from that location; the sun was going to rise behind Half Dome. I decided to head back to El Capitan to see what I could get there.

North Dome (I believe - the peak on the left)
and Half Dome
El Capitan is at the south-west end of the Yosemite Valley. For those of you who don't know, which I didn't until I started looking into Yosemite, the Yosemite Valley area is the main tourist attraction part of Yosemite National Park. Yosemite National Park is about 45 miles high by 35 miles wide, encompassing about 1,200 square miles. It is roughly the size of the state of Rhode Island and was visited by about 4.3 million people in 2015.

The Yosemite Valley, which is where the Yosemite Village including the Ansel Adams Gallery, views of Half Dome, El Capitan, and Yosemite Falls, is about 7 miles long and 1 mile wide. The Merced river falls into the valley from Vernal Falls and meanders through the valley from east to west. The Yosemite Valley is probably the most famous part of the park but it is not the entire park.

One of the valley's permanent residents
There was some road construction going on during my visit so I got to detour around the Yosemite Village area. As I was getting out of the built up portion of the valley I encountered a deer in the road. He basically paid me no mind after he convinced himself I wasn't going to run him over, taking his time to get out of the road and continue grazing along the sidewalk. I'm guessing that he's probably encountered a human before.

I continued on towards El Capitan along Norhtside Drive, passing by the Yosemite Falls Trail entrance. It's quite a noticeable structure, leading to the tallest waterfall in the United States at 2,435 feet high (a bit less than 1/2 of a mile). However, I had found the Yosemite Conservancy's Yosemite Falls webcam and knew that there was no water coming over the falls. It was bone dry and I thought I might walk up the trail but never did make it. In fact I didn't even get a picture of the entrance.

El Capitan peeking through some pine trees
I started glimpsing El Capitan through the trees. What an imposing bit of rock! It sits closer to the road than Half Dome and has about a 3,000 foot face. I actually like how it seems to be revealed to you slowly as you approach from the Village end of the valley, building up the excitement. I have watched a few YouTube videos about people climbing El Capitan and I have seen the same gradual view of the mountain. Now I was seeing it in person!

The traffic at this time was still pretty good, by the way. It was still about 7:00 AM and the rest of the tourists were probably still in bed or just getting their breakfast. I hadn't eaten yet, saving that task for a bit later, after I tried to get a sunrise shot or two. I was only going to have a few mornings in the park, and probably only one in the valley, and I didn't want to waste it eating.

The sun greets El Capitan
I pulled off the side of the road a bit west of El Capitan on one of the turnouts and set up to get some shots as the sun came up and hit the face. What a lovely site! I would end up spending most of my time in the valley shooting El Capitan instead of Half Dome or anything else. The Merced had water but not a lot. The waterfalls were not of interest in the limited time I had. The village itself isn't really that photogenic and once the other tourists started arriving it wasn't that fun to negotiate around them (especially with the road construction).

I shot a good number of photographs with my DSLR and then headed back to the village after the sun was basically fully up over El Capitan. I did stop and take a few shots from the Merced.

I had to climb over a good number of boulders to get to the location where I shot the Merced / El Capitan shots from and I have to say, I enjoyed the heck out of it. There was another guy there also shooting, one stop up from mine. I ended up walking around him so I could be in front of him, ruining his shot instead of the other way around.

El Capitan from the Merced River
He wasn't getting his feet wet though and I was. I really wanted to be over the water but never did find a truly great spot. I tried a few places but with the water so low I wasn't going to get any kind of reflection. For the photogs, I found my Nikkor 20mm f/1.8G was not wide enough. I had to switch to my 16-35mm f/4 in order to fit this shot.

It struck me how lucky I was to have the selection of lenses I needed. I actually had them laid out in the back of the Explorer. When I got to this location I tried the 50mm to see if it was okay, which it wasn't. By the time I'd tried the 20mm and realized I needed an even wider lens, I was not only grinning about being in Yosemite Valley but I was also grinning about my photo gear.

I had my lenses laid out like a smorgasbord of nice glass and was using them (well, I hadn't used the telephotos much - yet).

And, I thought I was making good choices. If I wasn't carrying my gear bag I did a quick look through a lens to see if it would work. If not I'd switch it with the one that would work. And I had a lens for most needs.

What I didn't have, though, was a neutral density for the 16-35 that would let me slow down the exposure to get the silky water in front of El Capitan. I was a bit bummed, especially since I'd made half of an attempt to get one from Tempe Camera before leaving but they didn't have one (for the Cokin system). However, once I got to the water and saw there wasn't anything to slow down anyway my grins came back.

Phone booth and shuttle outside Degnan's Deli
I continued on to the Yosemite Village area where I walked around a bit. I got a wonderful breakfast burrito and dark, strong, hot coffee from Degnan's Deli. The burrito is NOT on the menu. I had visited the main Yosemite Store, looking for hot coffee. I picked up souvenirs but they didn't like like they'd be good for breakfast so I put them in my Explorer and kept walking.

I had met a young couple on a sidewalk and the woman had a coffee. I asked where she got it and they told me Degnan's so I promptly asked about a breakfast burrito and the man said he'd had a huge one there. I was on my way!

I sat outside to eat it, observed constantly by squirrels, and watched the shuttle come and go. Afterwards I called my wife (I wasn't sure that anyone else's wife would answer my phone call) using the pay phone. No cell phone reception for me.

I walked through the Ansel Adams Gallery where they had an original print of "Muir Pass, the Black Giant" priced at only $84,900. I was at least $100 short so I didn't get it.

I strolled through the visitors center with a lot of information about the park. I got to see a life size bronze statue of John Muir. I sat outside of the theater deciding if I wanted to wait for the next show and took a shot of the mountain above the village.

Ansel Adams Gallery


Bronze statue of John Muir

The view from the theater

My wife had put in an order for a stainless steel souvenir ring so I stopped in the store again to get that. I have to say that I have kind of changed my souvenir purchasing. I like getting something from the places I visit but I don't need useless things.

In the past I've tended to buy T-shirts and I'd wear them. But I've got so many of them (including concert and sporting event shirts) that I gave away a good number that I'd never worn at Christmas last year to a family we sponsored at work. I have been avoiding buying them the last couple of years and instead I've been getting ball caps.

I wear ball caps when I'm camping and not getting a shower in order to hide my (barely) less than perfect coiffure. But the caps that were available were just not to my liking. They had a lot of calligraphy type fonts which looked like gangster styles to me and I just didn't care for them.

Heading to El Capitan along Northside Drive
What I started last year was getting stainless steel rings and I kind of like them. I got my first one from the gift store at Cape Foulweather on the Oregon coast on my way to my 40th high school reunion last year. Then I picked one up from the North Rim of the Grand Canyon. I added one from Yosemite. Then it was off for some time in front of El Capitan.

I passed by Camp 4 and was tempted to drive through it. That is where the people stay that plan to climb El Capitan and the other rocks like Half Dome. But I kept going...

Getting full of myself, I wanted to try to get to the base of El Capitan. I first pulled in to the El Capitan picnic area thinking I might be able to get to it from there. Since there was no one else around I decided it would be a good place to remove my long underwear in the outhouse. Since there was no one around but me it must have seemed like a good place for about 5 other cars to pull in to while I was changing my clothes, and for the occupants of those cars to see if the bathroom was available.

El Capitan's first line of defense
After getting out of the bathroom, I grabbed some gear and walked down the trail towards El Capitan but soon realized (after it came in to view) that I was quite a ways from it. I got back in my Exploder to drive a bit closer.

I got to the next pull off where there's a trail head. I didn't notice the trail head at first so started trying to just make my way through the pines, boulders, and underbrush up to the base of the cliff. I didn't make it too far. I climbed up a good number of boulders, wiggled through some stickery shrubs, but it became too much for me to navigate while holding my tripod.

I headed back to the car and that's when I saw the nice, wide, manicured trail with a number of other folk on it so I headed down it.

I got a ways down and started talking with a pretty young slender gal (aren't they all?) about the face. She said the trail went right up to the face - something I never found out because I started shooting from right there and just didn't finish the trek. Another thing I'll have to do on my next visit.

The reason I got distracted was because there were climbers on the mountain. I started shooting photographs of them. I had my Nikkor 70-200mm telephoto zoom and put it on. Other folks were passing by and a family of 4 got very interested in the shots and wanted to see them on the back panel. You could see some details about the climbers, their gear, and the cliff face itself. Then a group of about 5 young men who were also photographing stopped and took some shots and we talked for a while. It was a photographic geek and appreciation fest for maybe 45 minutes or so! Man I was enjoying my visit!

El Capitan Meadow, looking southish
I decided to head back to my Explorer, then drove to the El Capitan Meadow which is across the Northside Drive from El Capitan. There is a good bit of parking on the meadow side of the road and I took advantage of it and then walked out in to the meadow near a fallen tree that was also in shade.

The meadow has wonderful, long grass even though it was more brown than green in early September. But it's the type of meadow you don't see a lot of in Arizona. I'd seen another meadow the year before at the North Rim of the Grand Canyon and also enjoyed it. I hadn't wanted to leave it either.

This time I took my Nikkor 200-500mm f/5.6 with me into the meadow. I set up near the fallen tree where there was no one else.I got my 200-500mm lens on and started taking some shots. Within about 10 minutes I had a number of other folks either talking to me or congregating at the fallen tree, wondering why I was there. I think there were about a dozen people there. That was okay until the photography expert decided to join us.

Climbers on El Capitan
I shot some photographs of the climbers using the 200-500mm lens. The photography expert was asking how the lens was doing to which I replied it looks pretty good so he went to get his copy along with 2 tripods and 2 cameras. I didn't mind until he almost stepped on my bag with my other 4 lenses in it. I guess the shot was so good where I was in the open field that he couldn't set up 5 feet away in order to avoid stepping on my equipment.

I got up and left and went to take shots of other things in the meadow.

I shot some follow up pics from the meadow and decided to cap off my valley day by visiting Tunnel View.

Tunnel View is a favorite viewpoint east of the long tunnel on Wawona Road, looking into Yosemite Valley. There's a good chance you've seen photographs from the view point. A recent (I believe September 2016) issue of National Geographic had a nice shot from there (actually, from up on the hill above the parking lot).

I went up there to see what I could see of the sunset. There were a decent group of tourists assembled, and a few DSLR folks too. I couldn't help myself - I had to join them!

Tunnel View Viewpoint with El Capitan on the left,
Cathedral Rocks on the right,
and Half Dome distant in the middle
I took some shots there and they were okay - you have to take a photograph there if you visit Yosemite. It wasn't until later that I realized the iconic shots from that location include Bridal Veil Falls, to the right of Cathedral Rocks.

Since there was such little water flowing over it I didn't even notice that it was there, or more precisely, I didn't notice it was missing.

Afterward I headed back to camp, stopping to take a few shots along the way from some viewpoints along the Big Oak Flat Road which I hadn't stopped for in the morning. It was getting to be about 5:00 PM and I wanted to get back to camp before it was completely dark in order to make another helping of ramen and sausage and Ritz crackers! I needed fuel to keep the grin alive!

Looking south from Big Oak Flat Road


Saturday, September 17, 2016

Photography Notes from Joshua Tree National Park

Joshua Tree
Nikon D610 + Nikkor 20mm
20mm / f/8.0 / 1/250s / ISO 100
I've gone through my shots from Joshua Tree National Park which I stayed at on September 3, 2016. I was there one night and took photographs with my DSLR from about 5:50 PM to  6:20 AM, a span of about 12 hours that included sunset and sunrise. I also got in some night shots for good measure. I was much more happy with my dusk and sunset shots than my morning shots for some reason.

I did find that it was helpful using my new Nikkor 20mm f/1.8G lens to get the trees in the frame. I like this image which was shot fairly close to the tree and because of the 20mm I was able to capture the entire tree.

I think this shot is nice and sharp and has good color. Yes, it was processed in Lightroom but what isn't?

My biggest complaint, and this was for the entire trip, was that there were about zero clouds in the sky the entire week. I think this shot works because I positioned the camera low, perhaps about 2 feet off of the ground, which caused the tree to fill up the sky area.


A shot of my lens hood
I did end up having a problem with the lens hood on a lot of shots. This lens uses a tulip type shade. When it's on properly it works fine but I knocked my shade so that  it was twisted enough to show up in the shots. What an irritant!

After I got home and saw it, I happened on a YouTube where the photographer (I don't remember who it was) was talking about composition and eliminating everything extraneous in a shot prior to taking it and one way he accomplished that was to make sure that he did a full view around the viewfinder by starting in the upper left and looking all the way around the viewfinder to ensure there was nothing he should get rid of before pressing the shutter release.

I am going to try to adopt that technique and it would have made me realize that my lens hood was in the way. Note that the lower left corner isn't as obvious as the upper right corner; if the entire shot had content like the lower left corner in this shot it might be harder to detect.
Labels for the 16-35mm and 20mm lenses

On the other hand, I wish the hoods had a more definite detent or lock when they were in place as well as when they were reversed for storage or carrying. I also wish they were easier to identify or else that the same hood could be used on multiple lenses. I found I'd swapped my Nikkor 200-500mm f/5.6E hood with the 20mm hood because they look almost identical. They don't lock down as well when interchanged though.

Update 9/18/2016: I decided to put a label on the hoods for the 16-35mm and 20mm lenses identifying which lens that they belong to. While doing that I found out that I just wasn't turning the hood with enough force to get it to attach to the lens properly. There's actually a very nice, positive detent that engages on the hoods if you turn it far enough. Cool!

Milky Way at Jumbo Rocks Campground
Nikon D610 + Nikkor 20mm f/1.8
20mm / f/1.8 / 2.5s / ISO 4000
Overall the worst time I had was, again, trying to focus my lens for night shooting. The Milky Way appeared over the top of some rock formations at the campground where there were campfires in the front of the rocks and I thought it'd be a cool shot.

I shot quite a few shots before I got the lens focused.

I was finally able to do live view on a star but it took a long time. The following night I had the foresight to focus the lens before it got dark but at Jumbo Rocks it became a crap shoot.

I really like my 50mm f/1.8D that has a stop at infinity focus and wish the 20mm did too.

In the past I'd been able to find something to focus on even if it meant shining a flashlight on my car which was some distance away but I couldn't do that where I was. There were no buildings with lights at a distance that I could use. Eventually I got a star to come up in live view.

In this shot there was a campfire lighting up the front of the rocks and the top was lit by car headlights turning into the campground. At first I wasn't sure how the headlights would turn out but I kind of like them.I did have a couple of shots where the headlights were too bright (it was surprisingly busy at the campground and I was right near the entrance).


Joshua Tree and a road
One other note I have for this park and in general, some of the cool trees I wanted to shoot that were right next to the road just didn't yield great shots. The subject was okay but I either couldn't get a shot I liked where the road was masked or couldn't get rid of footprints around the base of the tree.

This points out that to get good shots you need to get off the road farther than I did or had time to. Sometimes you can hide things by placing your camera so they don't show up in the final shot. I really liked this tree - it had a lot of branches and no decay or dead branches. Unfortunately it is right next to a road and I couldn't get rid of all traces of the road in the shot.

You really need to be able to walk a bit at this park to get the good trees away from the roads and footprints.

You can see more of my Joshua Tree National Park photographs on my site at http://RandallMorter.SmugMug.com site.

Monday, August 22, 2016

AF-S NIKKOR 200-500mm f/5.6E ED VR Angle of View Examples

I went to Marshall Lake near Flagstaff, Arizona this last weekend, and shot a few photographs. By the time I got to Marshall Lake it was after the sun was up so I didn't get any shots with great lighting. But, I'd never been there before and really liked the location even if the photography wasn't great when I was there.

It's a pine tree forest with a large meadow with a lake in it. The lake was pretty empty in late August, but it didn't take away from the beauty of the place.


The meadow runs basically southeast to northwest, with the northwest end providing a vie of the San Francisco Peaks on the other side of Flagstaff. This included Humphreys Peak, the highest mountain in Arizona.


Nikkor 200-500mm f/5.6E ED VR
When I saw the view of Humphreys Peak I decided to use my newish AF-S NIKKOR 200-500mm f/5.6E ED VR Zoom to get a shot. If nothing else, it might prove that when there is snow on the mountains that this location would be a great place to capture it from.

Due to health reasons, I haven't shot much with this new lens and I really wanted to see what it would do. I was somewhat surprised...


According to Google Earth, it is close to 20 miles from Marshall Lake to Humphreys Peak. The 200-500mm lens has a 5°00' to 12°20' angle of view on an FX body. I am not very good at estimating angles, but I thought this would be a good fit.


Note: Google earth gave me an error saying I couldn't use the web version on Chrome - I had to use Internet Explorer! That's funny. Then the IE version wouldn't download the plugin. I ended up downloading and installing the desktop version.


I attached this bad boy lens, sat up my tripod at a small parking lot near the lake, where the boat ramp is, and pointed up the meadow towards the mountain. As soon as I looked through the view finder I was a but surprised.


I couldn't really fit all of the image in the photograph with this lens. Here's the view at 200mm which should be the 
12°20' angle of view:


Humphreys Peak (the highest peak on the left)
Nikon D610 + 200-500mm f/5.6, 200mm, f/8.0, 1/400s, ISO 100

I didn't want to cut off the mountains on the sides. I wanted to show the entire meadow - it was really peaceful and a nice change from the desert around Phoenix.


I had to try it, so here's the shot from the same location zoomed in to 500mm, which should be the 
5°00' angle of view:


Some of the San Francisco Peaks
Nikon D610 + 200-500mm f/5.6, 200mm, f/8.0, 1/400s, ISO 100

You can see the radio towers! While I appreciate the magnification, it was too much for this shot. Maybe if I was trying to photograph wildlife I'd have appreciated it. 


Here's the shot I ended up preferring, shot with my AF-S NIKKOR 70-200mm f/4G ED VR, which according to Nikon's Angle of View calculator, should be 30
°60':


San Francisco Peaks from Marshall Lake
Nikon D610 + 70-200mm f/4, 78mm, f/8.0, 1/400s, ISO 100

The bottom line is that I was amazed by the magnification and narrow angle of view of the 200-550mm lens. The image quality is good. But I was really happy that I had the next size smaller zoom to capture this image. I am really enjoying my lens collection! 


Free Bonus!


I thought I'd throw this in too - I was getting bored in the bright daylight so I decided to take a selfie with my pup Elmer:


Elmer and I at Marshall Lake, Arizona


Sunday, August 21, 2016

Depth of Field example from my AF-S NIKKOR 20mm f/1.8G ED

I was able to get out of the house this weekend (8/20/2016), visiting the Wupatki National Monument north of Flagstaff as part of my day excursion. I've been wanting to go there for some years and finally made it.


Lomaki Pueblo
Nikon D610 + 50mm f/1.8D, f/8.0, 1/200s, ISO 100
I didn't visit all of the ruins; I had my dog Elmer with me and it's just getting hard to get around with him. Dogs aren't allowed on the trails at Wupatki.


Lomaki PuebloNikon D610 + 20mm f/1.8G, f/8.0, 1/160s, ISO 100
The ruins that I did visit were fine and I think I got some good shots of them at sunrise. I wish I'd been there just a bit earlier (the north entrance was open when I got there at a little after 6 AM) in order to try to get a sunburst through a window of one of the ruins. Perhaps next time. 

I took a photograph with my Nikkor 50mm f/1.8D but soon found out it was too long. So, I mounted the new 20mm f/1.8G ED to give it a go. The images are very sharp - I like it!


Box Canyon Dwellings
Nikon D610 + 20mm f/1.8G, f/10.0, 1/125s, ISO 100
 Depth of Field

When I was leaving I came across some Morning Glory flowers that caught my eye. I decided to shoot them with the 20mm f/1.8G ED to check out the DOF (Depth of Field). The image below shows how shallow the DOF is. It really was my intent to get the entire flower in focus but as you can see, it didn't work out.


Morning Glory
Nikon D610 + 20mm f/1.8G, f/2.2, 1/1250s, ISO 100
I was shooting at f/2.2 on my Nikon D610 with the flower approximately 1 foot from the focal plane. It may have been less; I didn't measure it. I just know it was close to the front end of the lens in order to fill the frame with the flower as much as possible.

According to DOFMaster, for a Nikon DSLR with a 20mm lens, f/2.2 and 12 inch focus, the total DOF is 0.77 inches! A smidge over 1/2 of an inch! That seems about right (DOF is subjective after all, depending on your threshold for acceptable focus) when you look at this image. The far end of the petals and pistils are out of focus.

Here's one more example, taken at Marshall Lake, southeast of Flagstaff, Arizona. 


Plant DOF Example
Nikon D610 + 20mm f/1.8G, f/2.0, 1/3200s, ISO 100
If you're interested, you can view the rest of my photographs from Wupatki National Monument on my online gallery at https://randallmorter.smugmug.com/Arizona/Wupatki-National-Monument/.

Saturday, August 13, 2016

First photos with my new AF-S NIKKOR 20mm f/1.8G ED

I got my new AF-S NIKKOR 20mm f/1.8G ED lens yesterday in time to try to shoot the Perseid meteor shower with it. I went out last night to a spot east of Apache Junction, Arizona, with the Arizona Night Photography group from meetup.com. There were quite a few people there; on the website 77 people said they'd be there.


Arizona Night Photography group
Perseid Meteor Shower 2016
The spot had pretty good levels of light pollution even that close to Phoenix. Unfortunately the moon didn't set until about 1AM. Not that it mattered, we didn't really see much of a concentration of meteors. I was there from about 6:30 PM to about 2:30 AM and probably only saw about 20 meteors or shooting stars. A couple were pretty bright but for the most part it was the same as my previous meteor shower outings - pretty underwhelming. I was bummed because this was being touted as the best event of 2016.

This outing worked like my others (I've tried to shoot Perseid and Geminid showers in the past). I'd see a meteor to my left so I'd point the camera that direction and take a number of shots. While doing that I'd see a meteor to my right so I'd recompose. A gal I met last night likened shooting meteors to shooting whales. You never really know where they're going to show until they're already gone. 

If there was truly a concentrated emanation point it might be different. But I haven't experienced that myself.

I still tried to get some shots with my new lens, even if they weren't including any meteors. I really wanted to see how it worked.

The bottom line is that I think the lens works great, at least compared to my AF-S NIKKOR 16-35mm f/4G ED VR. But I still had the same problems using it.


Moon Glow
20mm - f/2.0 - 2.0 sec - ISO 400
I shot 70 images but only got a few that were in focus. I really have a hard time focusing in the dark. The best subject was the moon but that was only good for the distant subjects such as stars. I was able to do that okay and I think the focus is pretty good. I like that I could use a lot shorter exposure time due to the faster (larger diameter) aperture. 

The image at right was shot with my Nikon D610 and the Nikkor 20mm at f/2.0 and ISO 400. I did crop it because the rest of the foreground at the bottom was out of focus.

The larger aperture diameter also reduces depth of field and it really came in to play. I was hoping that the larger aperture would allow me to focus easier since I thought I'd be able to view the subject better, either through the view finder or in live view. It didn't seem to make much improvement over the 16-35mm for me, however. I still struggled to focus.

I tried auto focus too but it was worse than manual focus. 


Focal Plane Example
20mm - f/1.8 - 8.0 sec - ISO 500
I shot this capture of a cactus but you can clearly see that the focus plane runs somewhere through the middle of the cactus. Some of the needles in the upper "crotch"  of the cactus are in focus as are some of the "blooms" on the ground. This image doesn't have any post processing done to it so you can also see the other artifacts.

So even though I shot a few pics, I don't have much to show for it due to my focus problems. I just couldn't focus on close objects. (The problem was not due to auto focus changing the focus when I shot the photograph - I had the auto focus turned off OR I used back button focus - focus doesn't change unless I want it to.)

If I hadn't been with the group of people trying to shoot night photographs I would have lit up the subjects with a flashlight while focusing.

Beyond that problem, which is with my technique or abilities and not that of the lens (since a few images were in focus), I had heard that the coma was really good in this lens. I know I've had issues with coma in my 16-35mm but this lens is a lot better behaved, probably due to the aspherical elements is my guess. And because this is a prime instead of a zoom.

Here's a pic with a bit of exposure adjustment but you can see the coma in a number of places in the corners. It's not bad. I haven't done it myself but I recently watched a YouTube of a photog who edits the stars that have bad coma, I think it was in Photoshop, and he'd just apply a round mask to the offending stars and get rid of the coma shapes.


Coma Example
20mm - f/1.8 - 8.0 sec - ISO 1000

I'm pleased with the lens so far and can't wait to put it through some more paces.


As for the outing, when I left the appointed location I travelled over to the Superstition Mountains to see if it was any better. It was sort of on the way home and allowed me to wait until a bit later. I got there around 3 AM. I got out of my Explorer, waited maybe 15 minutes but didn't see another meteor so headed home. 

I haven't been out much this year due to my health issues and this little shoot was very pleasant. The air temperature cooled after about 11 PM, maybe to 85 degrees F or so. Just sitting out under the sky, seeing part of the Milky Way with my own eyes, was simply wonderful. I got to meet a couple of gals who are knowledgeable about photography (both shooting full frame Sony A7 and A7R) and was able to talk to them for hours about camera gear and post processing. I don't care if I didn't get any good meteor images - I got a lot of pleasure!